This is How You Can Make a YouTube Worthy Ad (ft AVS4YOU)

The age of social media has been truly disruptive. In fact, it has reinforced how much human-beings loved consuming videos, whether for entertainment, education or any other purposes. In YouTube, the world’s most popular video sharing cum social media platform, has over 2 billion monthly active users! Not discounting that this number doesn’t include those watching without logging in! Hence, if you are thinking of taking up paid video ads on YouTube, you are on the right track. Yet, one can’t advertise in such a popular platform with global audience without a worthy video ad. So, here comes AVS4YOU, a highly powerful multimedia suite, consisting of video editor, converter, audio software, and other useful tools.
The world wide web is huge, and yet you had stumbled on my site looking for something. I hope you find it as we had taken huge efforts to create them. Best of all, its FREE! Hence, some of our content may include affiliate links (i.e. whenever you click on the links and purchase, I earn a small commission at no extra costs to you!). No worries! Some of these links may look like phishing, but I assure you they are not! Lastly, the affiliation does not affect my reviews towards them. Enjoy!
In this tutorial, we will be using AVS4YOU Video Editor, version 9.5.1.383, to create a YouTube-worthy Ad on our Windows desktop. The step-by-step tutorial will include our personal comments as well as tips. So, read carefully, and work through the steps. With this tutorial, anyone can be a Video Marketer with AVS4YOU!

Below is our Video Ad made with a Free Trial of AVS4YOU Video Editor using royalty-free stock videos and audio from Pixabay and Pexels. Apologies for the watermark due to trial version.
Tutorial
- Adding Videos as Scenes
- Setting Sequence of Scenes
- To Delete Any Scene of Object (due to wrong placement)
- Trim the Scenes
- Add Audio (including voiceovers etc.)
- Trim the Audio
- Add Transitions Between Scenes
- Add Video Effects
- Make Colour Correction
- Add Texts
- Change Video Format Before Finalising Your Video
Step 1. Adding Videos as Scenes
First of all, you will need to have your videos ready, either recorded, or pre-owned with permission rights. In this step, you will need to insert your videos in accordingly. So, insert them according in this way following the steps below, then proceed to step 2.
(Tips) Typically for advertisement, there are 3 scenes; Intro, Main, and Outro. The intro serves as a powerful attention-grabbing scene. So, make use of powerful visuals, headlines, and louder audio to draw the audience in in this intro scene. Then, the Main shall inform your audiences the main objectives of your video ad. Hence, keep the bulk of information you wish to communicate, including explainers, demos etc in main. Lastly, in your outro, use a strong Call-to-Action (CTA) and leave your contact details for your audiences to connect with you. For outro, you may wish to set your audio to gradually get softer towards the end.
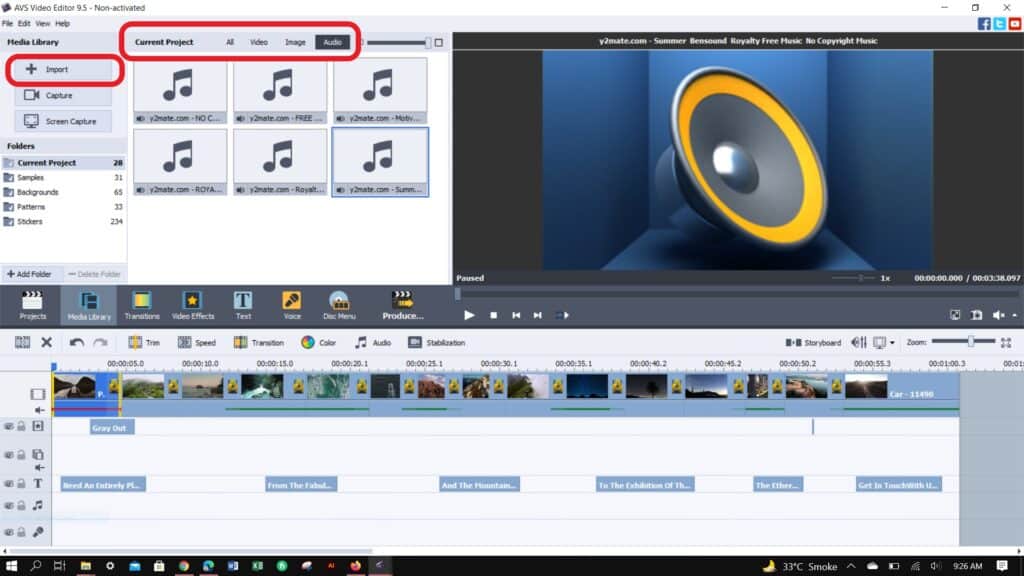
- Open your AVS4YOU Video Editor on Mac or PC and click the “Media Library” tab from the middle bar.
- Select the type of file you want to import from the “Current Project” bar on top and click the “Import” option on the top left corner.
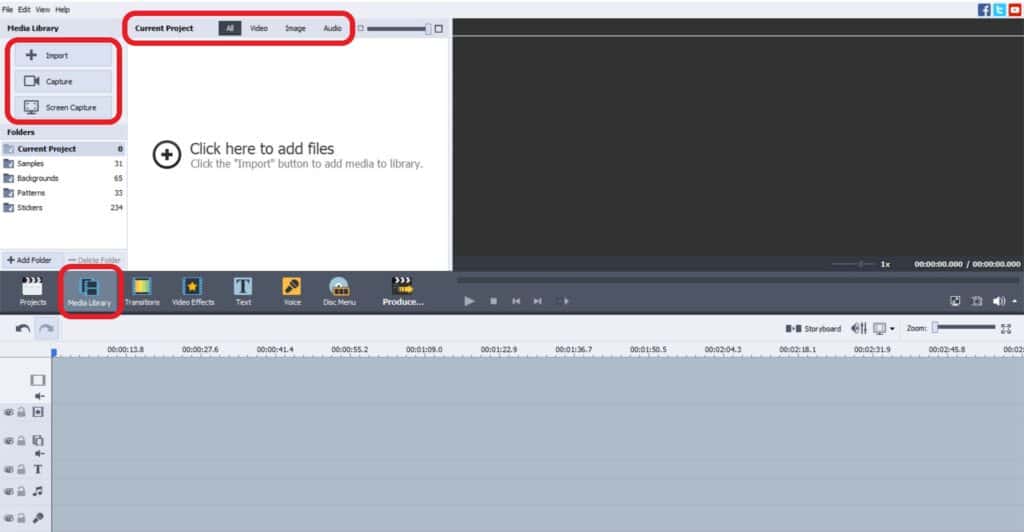
- Once the file explorer opens, select a single or as many files as you want to add to your video and click “Open.” It will add the files or objects.

- (Optional): You can also choose “Capture” or “Screen Capture” to record your computer screen and add it to your video.
(Tips) You may use the “Folders” section below the “Media Library” to add different objects such as stickers or backgrounds in your edit.
Step 2. Setting Sequence of Scenes
If you had not inserted your video in the scene sequence you want, use this step to arrange it.
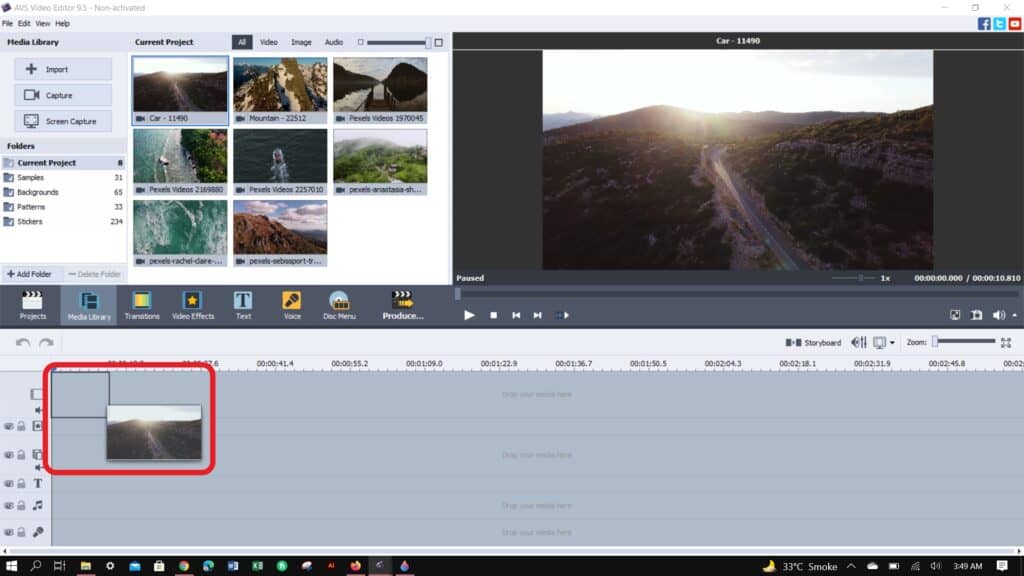
- Double click and hold the scene. Then drag it to the desired timeline and drop (release the mouse click).
- (Optional): You can also “Right-Click” the object you want to add and then select the “Add to Main Video” option from the context menu.
Step 3. To Delete Any Scene of Object (due to wrong placement)
Placed any wrong scene or object, don’t worry. You can always remove it completely using this step.
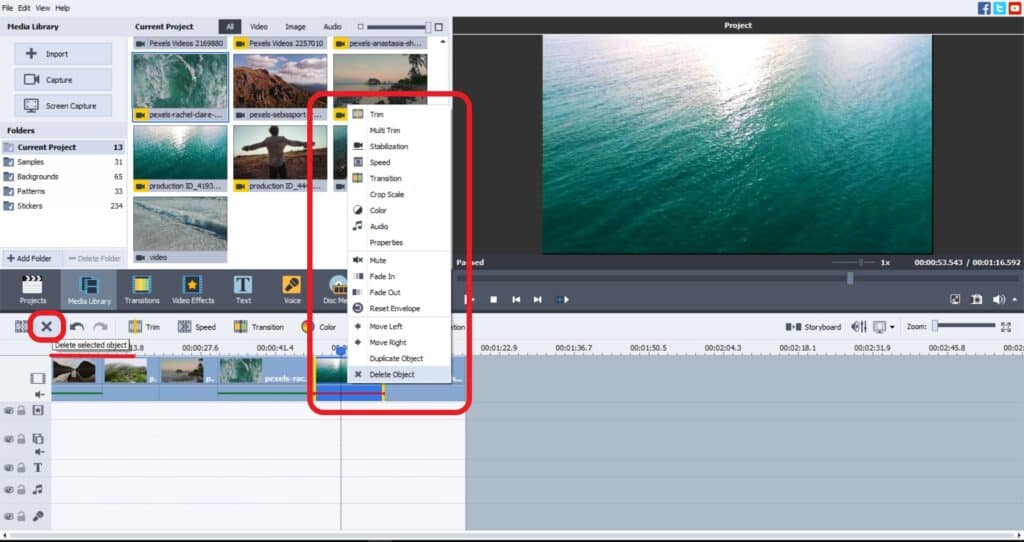
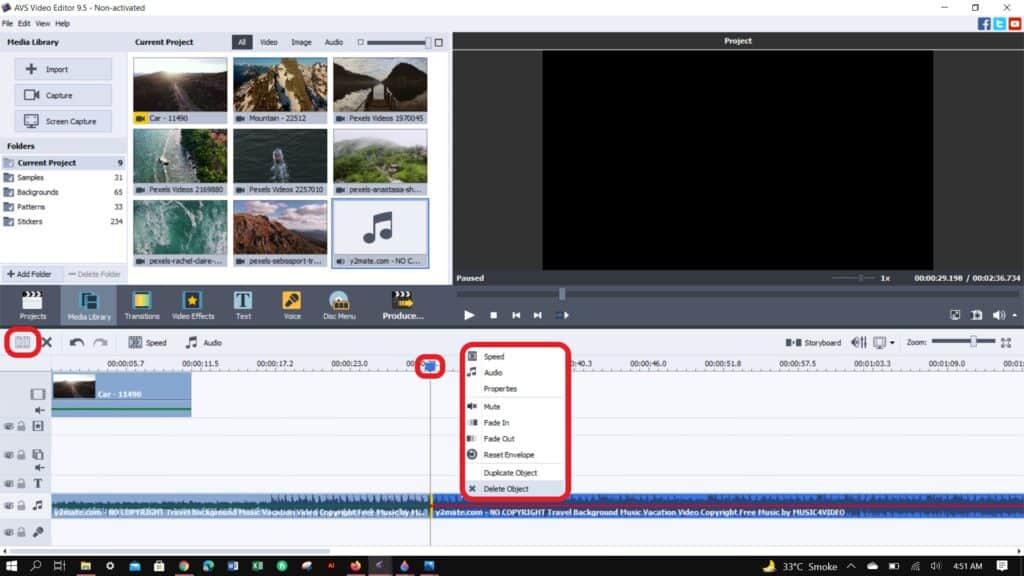
- Right-click on the Scene or Object from the bottom timeline you wish to delete.
- Select the “Delete Object” option from the context menu. Or click the “X” button present in the middle bar, left-side of the screen.
Step 4. Trim the Scenes
Yes, you can place any raw unedited videos in as scenes then edit them using AVS4YOU directly. This step is to trim its duration.
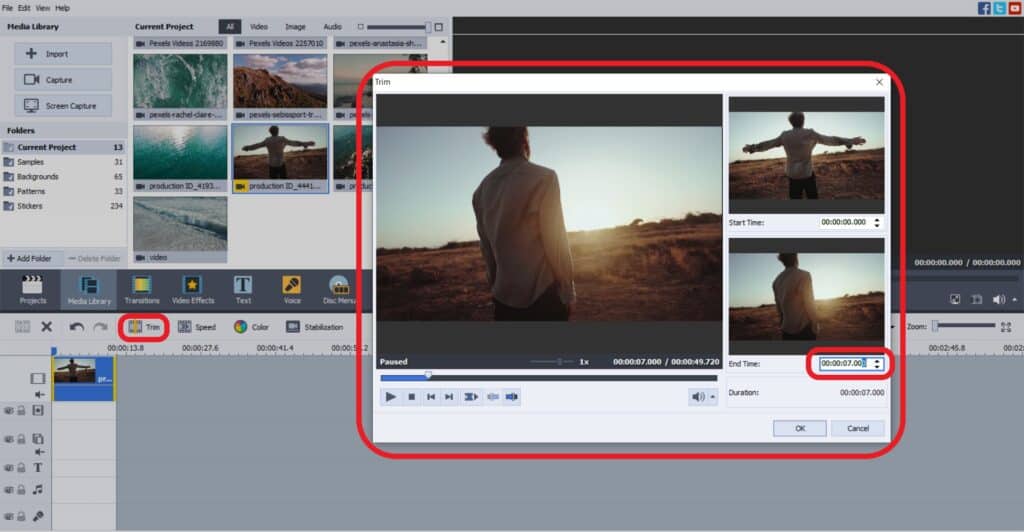
- Select the video clip you want to trim and click the “Trim” option from the middle bar.
- The “Trim Dialogue Box” will appear. Here, edit the video’s “Start and End” time, which should precisely trim down your video.
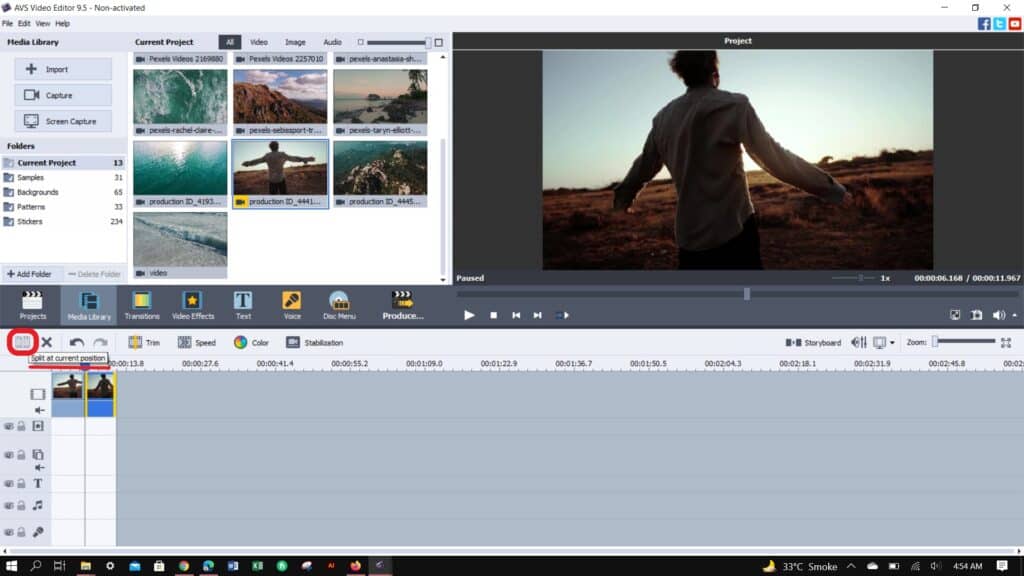
- You can also trim a video clip by moving the “Blue Pointer” to a certain point (as in the image below).
- Click the “Split at Current Position” option on the left side of the middle bar.
Step 5. Add Audio (including voiceovers etc.)
This step will add audio into your scenes. You can add a pre-recorded audio, or record a voice-over directly. Although for the latter, you will need to prepare your script in advance.
- Click the “Media Library” tab from the middle bar and select “Audio” from the current project bar on top.
- On clicking “Import,” a file explorer will pop up. Select the preferred audio files and click “Open.” Now you have added the audio files in the “Current Projects” folder.
- To add the audio in the timeline, double click, hold, and drag the desired file in the “Music Line” of the bottom section (timeline). And then drop it.
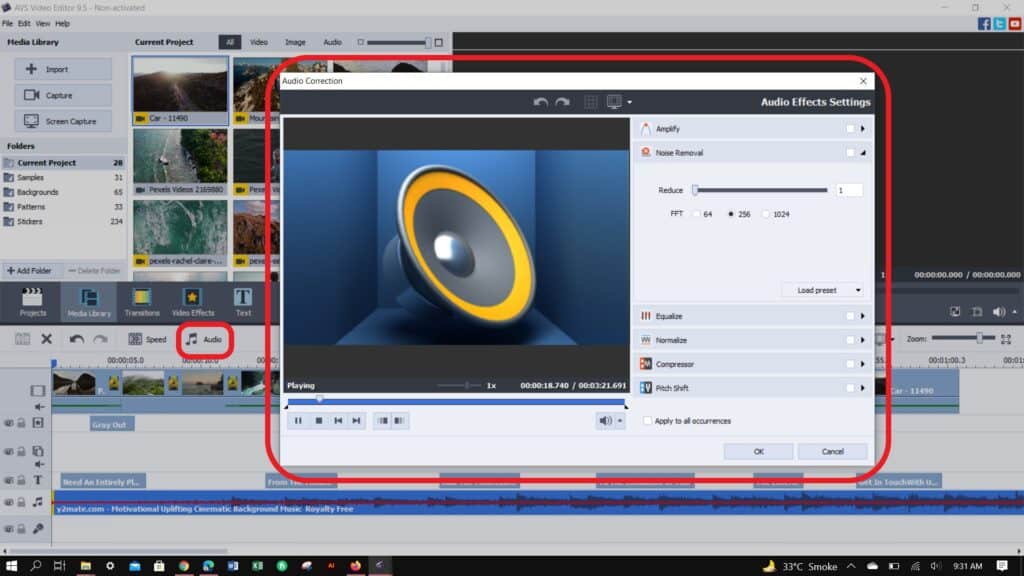
- Click “Audio” from the middle bar. An “Audio Correction” dialogue box will appear.
(Tips) Here, you can make suitable audio adjustments such as amplifying its loudness, equalizing it etc. This is more for the advanced users, although you may try tweaking it to your liking.
- If you want to add voiceover toyour video, click the “Voice” tab (the mic image) in the middle bar. A “Voice Record” section will open. Make appropriate adjustments, then start recording.
Step 6. Trim the Audio
Similar to Step 4, add any unedited audio then trim it here. Its easy!
- Single-click or select the audio file in the timeline.
- Bring the “Blue Pointer” to a particular audio point you want to trim.
- Click the “Split at Current Position” option from the left. Right-click the unwanted part and select “Delete Object” from the context menu.
(Tips) You can also perform the same process through the “Audio Correction” dialogue box. However, it will be a little challenging to trim perfectly from here.
Step 7. Add Transitions Between Scenes
Surely, you had watched some movie before, right? Notice how scenes move from one to another? This is called transition and it will play a huge role in making any good videos.
(Tips) Take the time to browse from AVS4YOU’s list and choose the most appropriate one that is reflective of the mood closing from one scene to opening another.
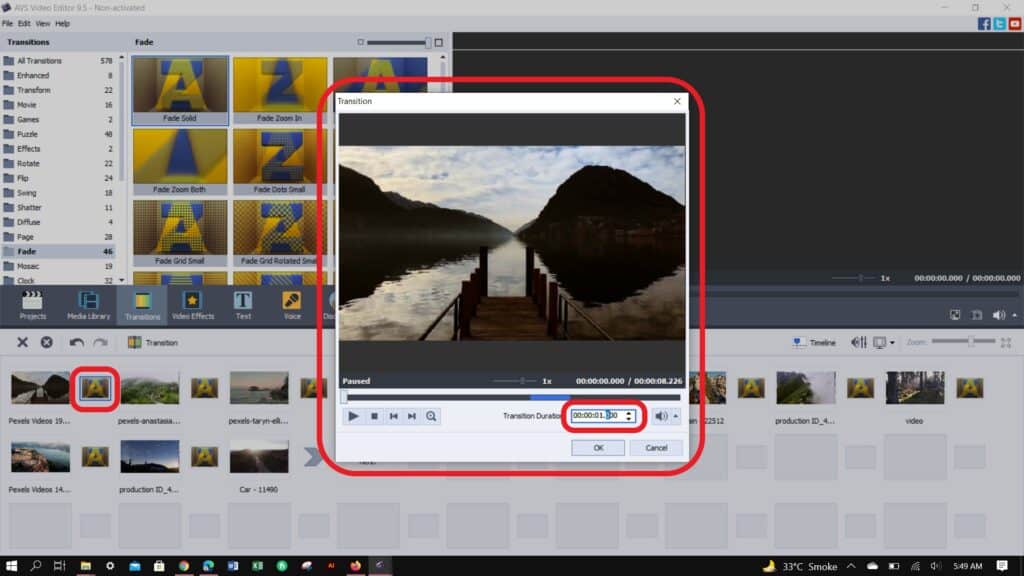
- Click the “Transition” tab from the middle bar. There are hundreds of transitions that you can add to your videos.
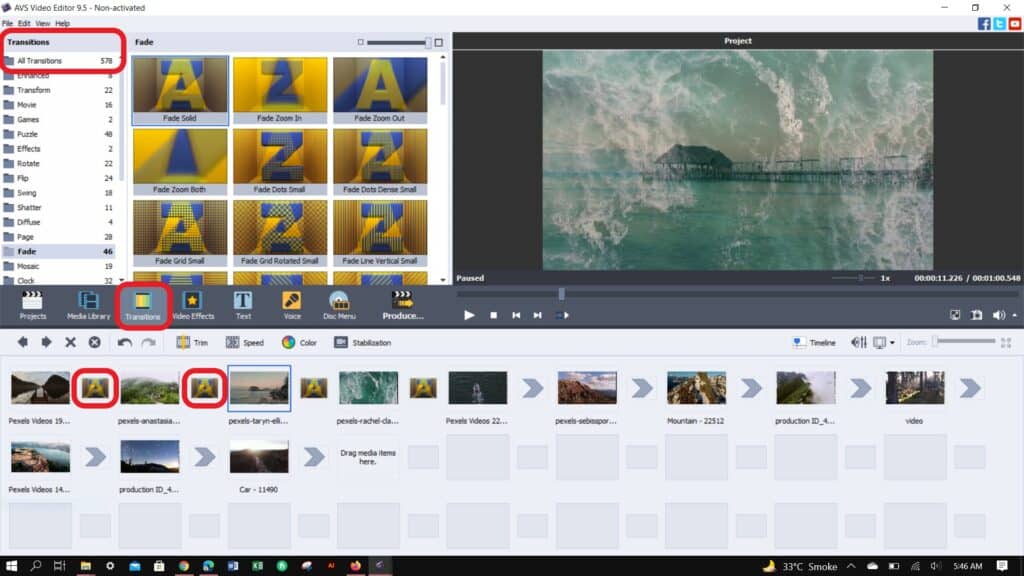
- To insert transitions, select them one by one and drag and drop them on the provided area in the middle of the video clips.
- Double click an inserted transition to open up a “Transition Dialogue Box.” Here you can increase or decrease the transition duration however you like.
Step 8. Add Video Effects
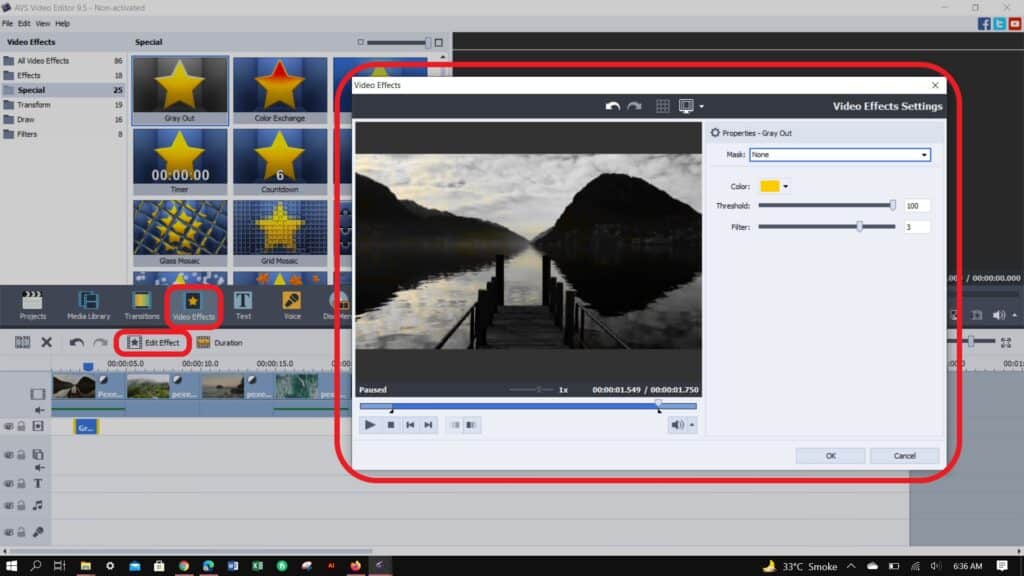
Video effects are commonly used, although not every one of them. Particularly, the ‘Gray Out’ is more common used. To illustrate, we had used ‘Gray Out’ in our Video, between the 2 seconds to 5 seconds mark to create an opening and closing ‘feel’.
- Click “Add Effects” in the middle bar and select whatever effect you want to feature in your video.
- Drag and drop the selected effect in the “Video Effects Line” in the timeline.
- Click “Edit Effect” in the middle bar, and a “Video Effects Dialogue Box” will open. You can desirably edit your effects here, including trim, color scheme, mode, and fades.
Step 9. Make Colour Correction
This is a very important step! Colour correction is used to ‘homogenise’ the overall colours of each scene so that all of them as a whole video looks uniform as they should be.
(Tips) Un-uniform videos look unprofessional! Thus, learn how the various settings in colour correction work. i.e., temperature, contrast, saturation etc.
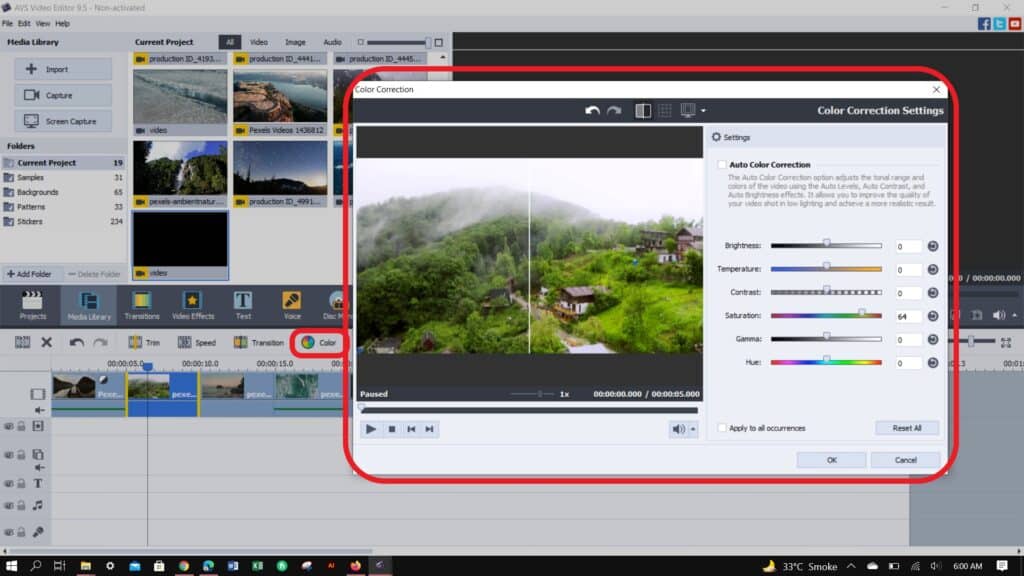
- Select one of the scenes. The “Color” option will appear in the middle bar.
- Click this option, and a “Color Correction Dialogue Box” will pop up.
- Click “Auto Color Correction” to tone up the video clip automatically. Or make manual adjustments by moving the sliders just below it.
Step 10. Add Texts
Texts are used in a whole lot of ways in videos. Use texts as headliners, explainers, CTA, contact information, watermark etc.
(Tips) Texts, like audios, transitions, and effects, affect the overall feel of your video. Spend sufficient time to look through the fonts and type available in AVS4YOU. Customise the size accordingly with the important texts such as headliners being larger. Don’t forget to make use of BOLD and Italic too!
- Click the “Text” tab in the middle bar and select a preferred text style.
- After selecting, drag and drop the style in the “Text Line” of the timeline.
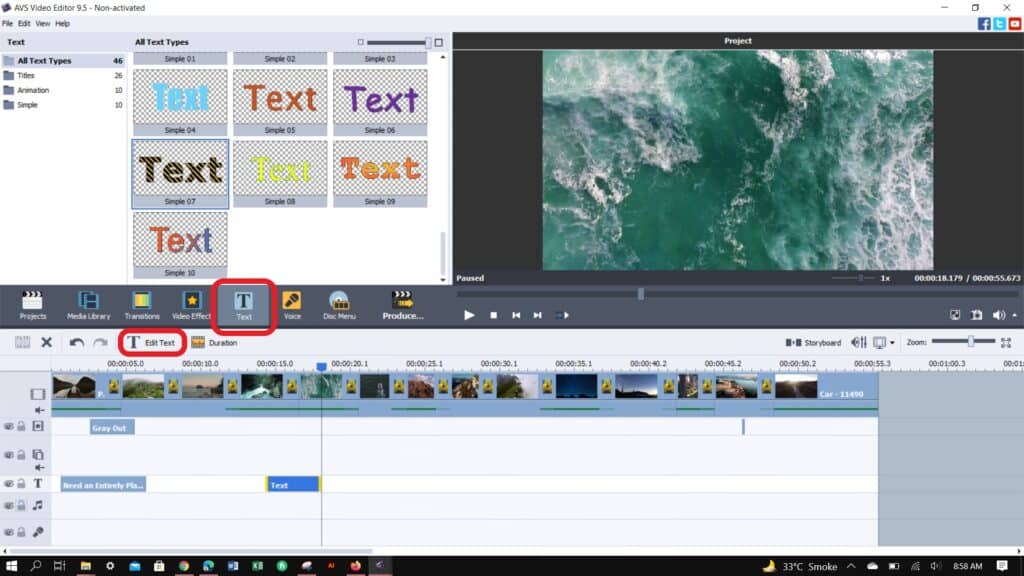
- Click “Edit Text” to open a text dialogue box. Here, you can edit your text by adding fade, font type and style, shadow, edge, and brush.
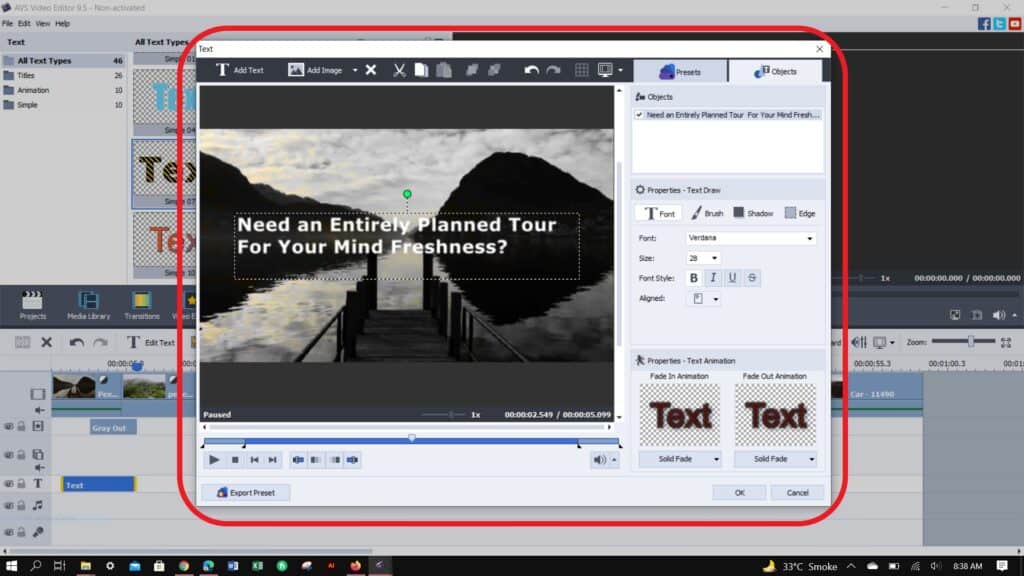
- (Optional- Add Watermark Using Image): In case you wish to add a watermark using an image instead of a text, Click “Add Image” on the top of the text dialogue box. Now, change the image size and opacity (angle) to your desired and click “Ok.”
Step 11. Change Video Format Before Finalising Your Video
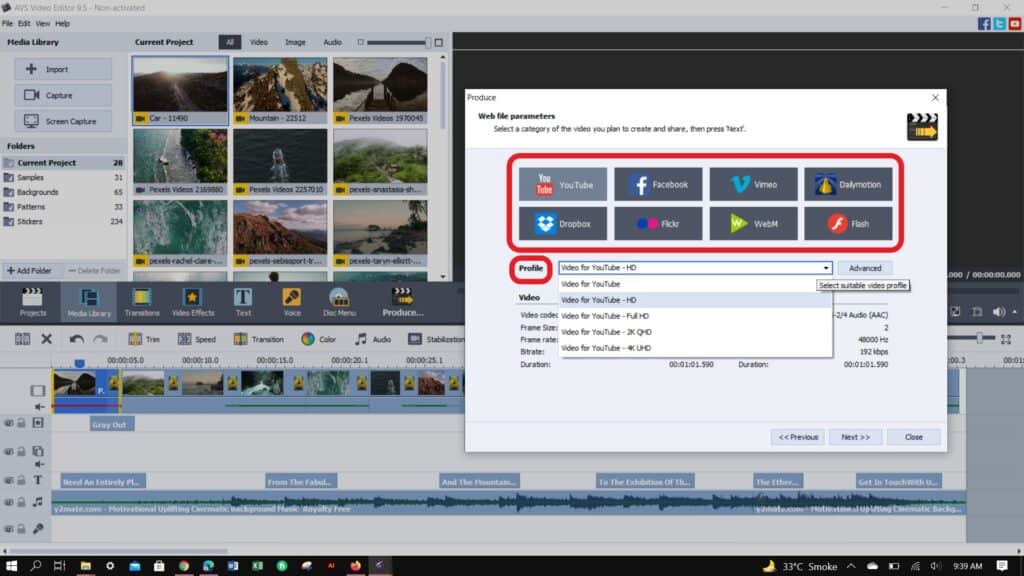
The last and final step! Know which channel your video is going to be posted in. Then, browse from the list of profile available in AVS4YOU and save it accordingly to get the most optimized video (i.e. codec, frame rate, bitrate etc.).
(Tips) Fortunately, AVS4YOU contains various popular categories and profile, ranging from YouTube, Facebook, Vimeo, and Dailymotion to Flash and more. Otherwise, these are really technical to set manually. It is recommended to Save the file as an unfinished Project format for future editing. To do so, just go to ‘File’ at the top-left hand corner and Click ‘Save as’. In any case you wish to create this video in another format, just open this Project and perform this Step 11.
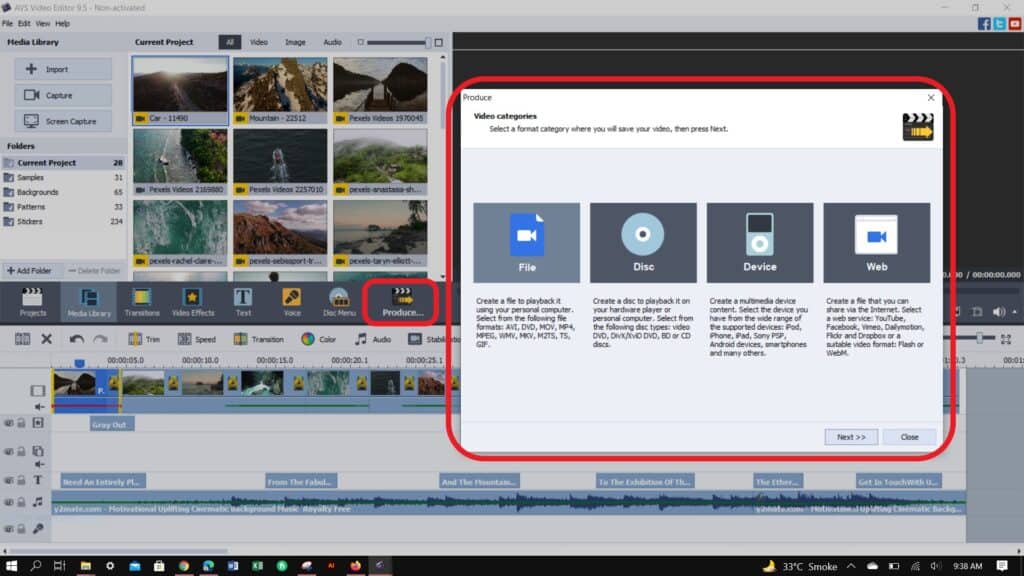
- Once you finish editing your video, click “Produce,” and a dialogue box will appear.
- Select your video category from the four categories and click “Next.”
- The editor will then ask you the “Video Sub-Category” and “Profile.” In the image below, we have selected “YouTube” as the primary category. So, select your best fit and click “Next.”
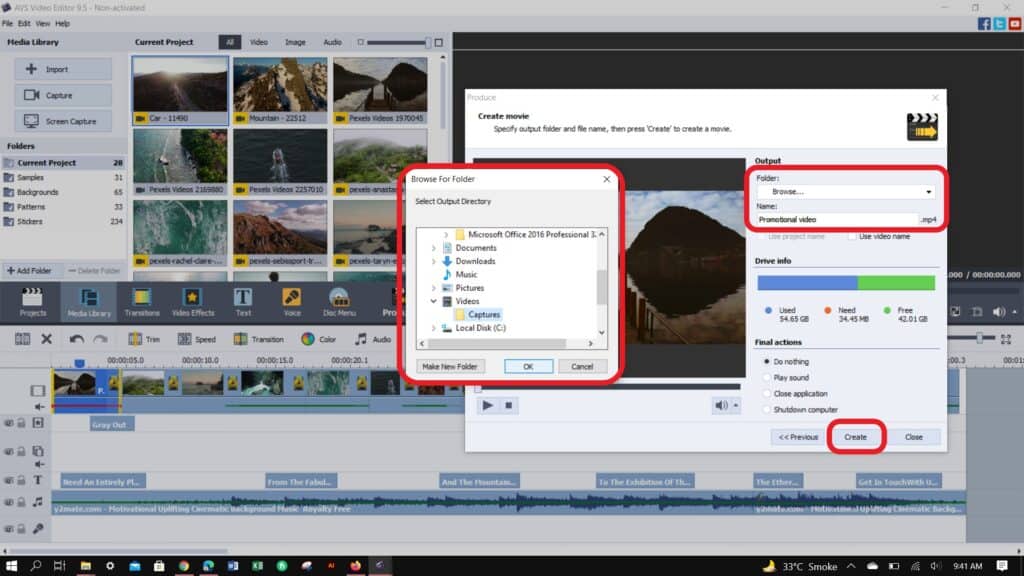
- Browse a folder from your computer to save in the video and give a designated name.
- Click “Create,” and it will save your work.
Final Comments
Tried our steps yet? Don’t fret that you can’t make videos no more! Anyone can, in this age of Social Media as long as they have the software that they know how to use. While AVS4YOU is a very useful and simple multimedia tool, it cannot make animations and does not have its own stock library. Still, this software is a good start to any video making! Try it out!

Activities
What kind of videos beside Ads do you need to make in your work? Tell us with a COMMENT below.
LIKE & SHARE this article with the world so we can enjoy better videos!
HASHTAG #DonutAtwork
Would you need to make animated explainer videos? Read our review of Toonly HERE.
What other Video Ad Makers do we like! We Tell you in this Article! Some Tags you may be interested: Creative Development | Graphics Editor | Social Media Management