Creator Alert! This WeVideo Tutorial is All Yours to Make Stories & Meme

We are back with video making! This time, we are going to make Stories and Meme videos in this WeVideo tutorial! The leading online video creation software is used by over 30 million users worldwide. In addition to, WeVideo is highly rated across review sites like Trustpilot, Capterra, and many others.
Above all, WeVideo is free to use, has its Mobile App to support editing on-the-go, and requires no installation! Yes, you read this right! So, read on and see how you can sign up in our WeVideo tutorial!
The world wide web is huge, and yet you had stumbled on my site looking for something. I hope you find it as we had taken huge efforts to create them. Best of all, its FREE! Hence, some of our content may include affiliate links (i.e. whenever you click on the links and purchase, I earn a small commission at no extra costs to you!). No worries! Some of these links may look like phishing, but I assure you they are not! Lastly, the affiliation does not affect my reviews towards them. Enjoy!
- Getting Started With WeVideo
- Overview of WeVideo
- Making a Stories Video
- Making a Meme Video
- WeVideo Mobile App
1. Getting Started With WeVideo
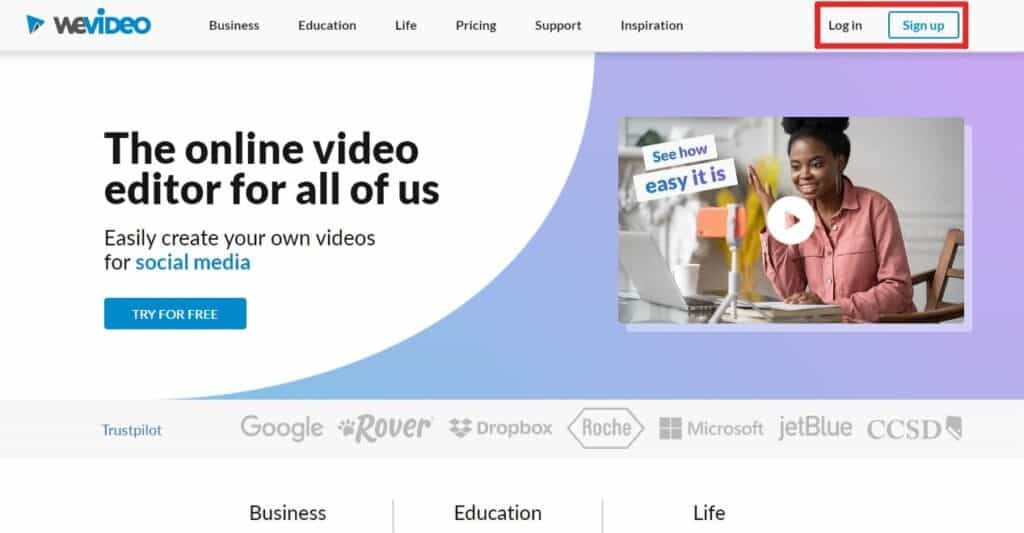
Without needing to download and install any program on your PC, WeVideo makes video creation and design easy with its cloud-based editor. Just go to https://wevideo.com and sign up. Furthermore, you can sign up by just using your Google or Facebook account details.
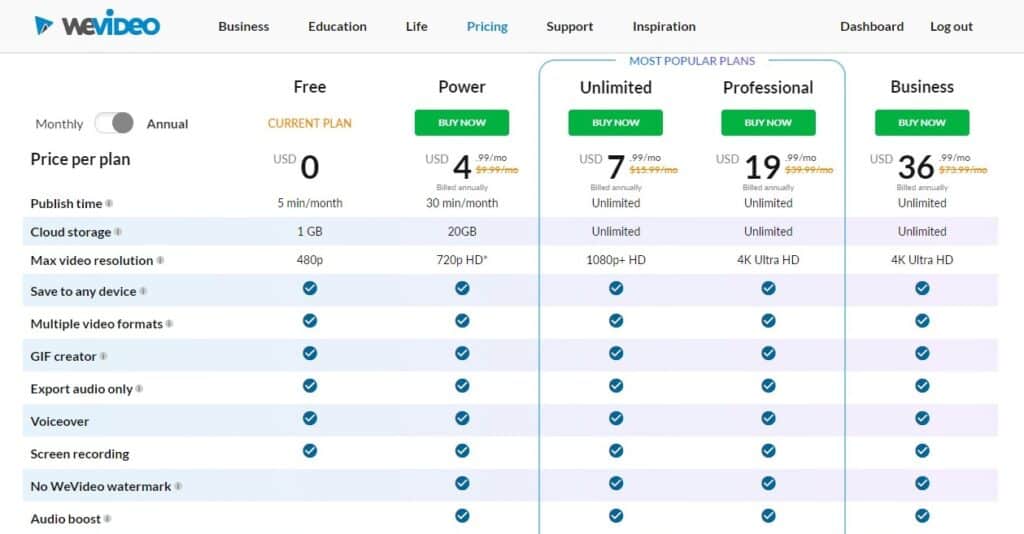
The good thing to know is that WeVideo has a freemium plan. Though, that’s not to say there isn’t any feature limits. So, if you need, be sure to check out their pricing plans that offers much more powerful features. Nonetheless, let’s try the free version in this tutorial to get a hang of WeVideo.
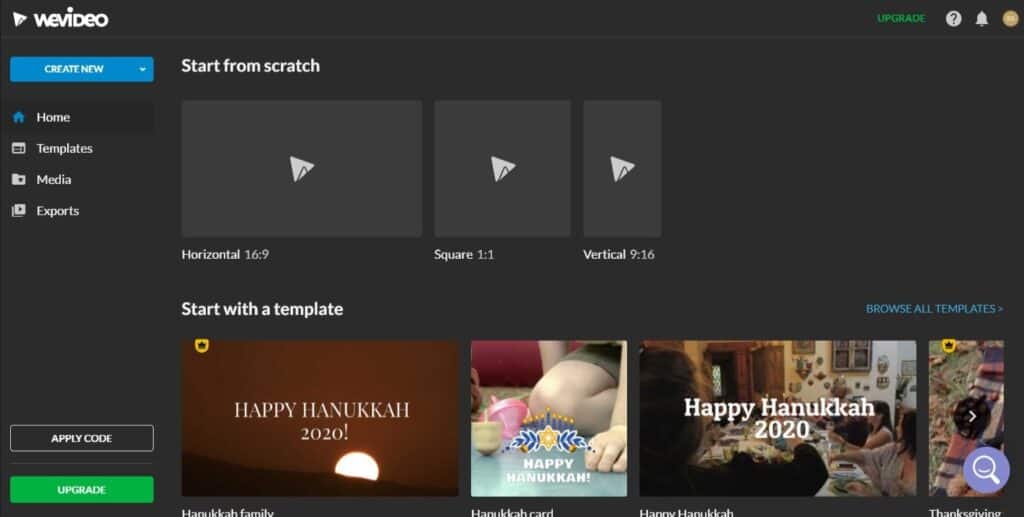
After signing in to your account, you’ll be redirected to the WeVideo dashboard. Here is where we’ll start exploring WeVideo and all its features.
2. Overview of WeVideo
WeVideo is one of the simplest, yet powerful platform for creating and designing videos. That said, its well-optimized UI makes design work easy, fast, and to a large extent, fun! Now, let’s have a quick overview of the WeVideo dashboard.
Here, you can see your WeVideo projects (if any), as well as, any imported media and exported videos. You can also access your account settings and upgrade your account subscription. Plus, browse through a large collection of WeVideo’s ready-to-use templates!
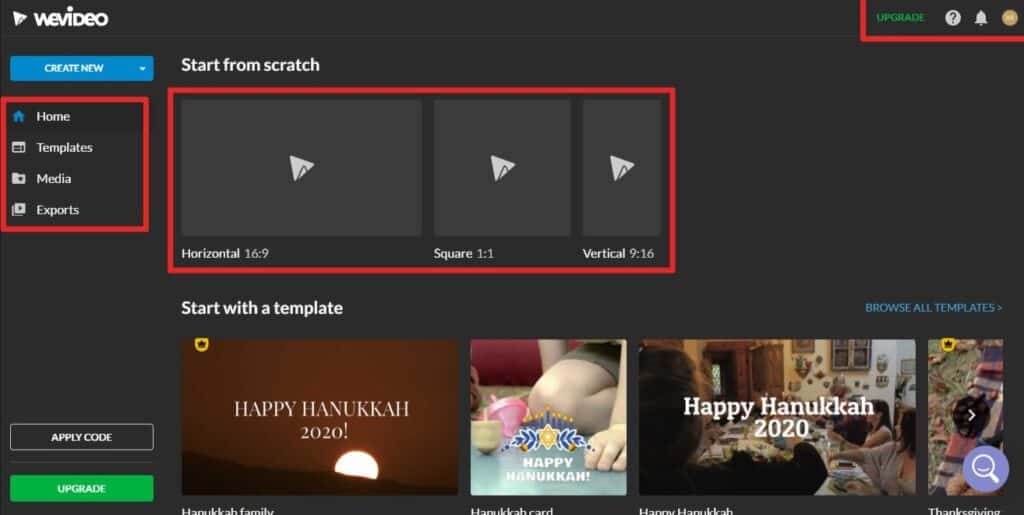
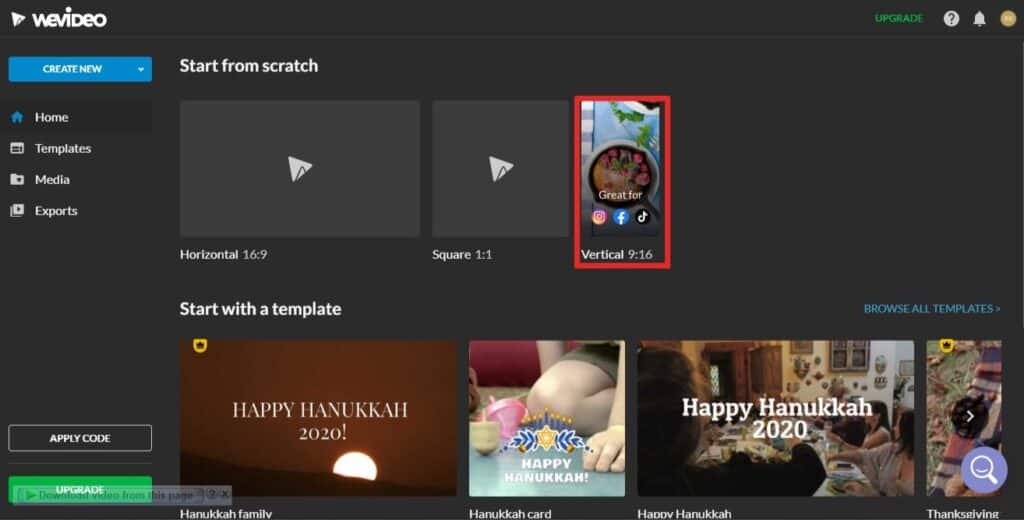
Without further, you can actually start creating designs from the dashboard via two methods. (i) First, is from scratch and (ii) second, is with the help of templates.
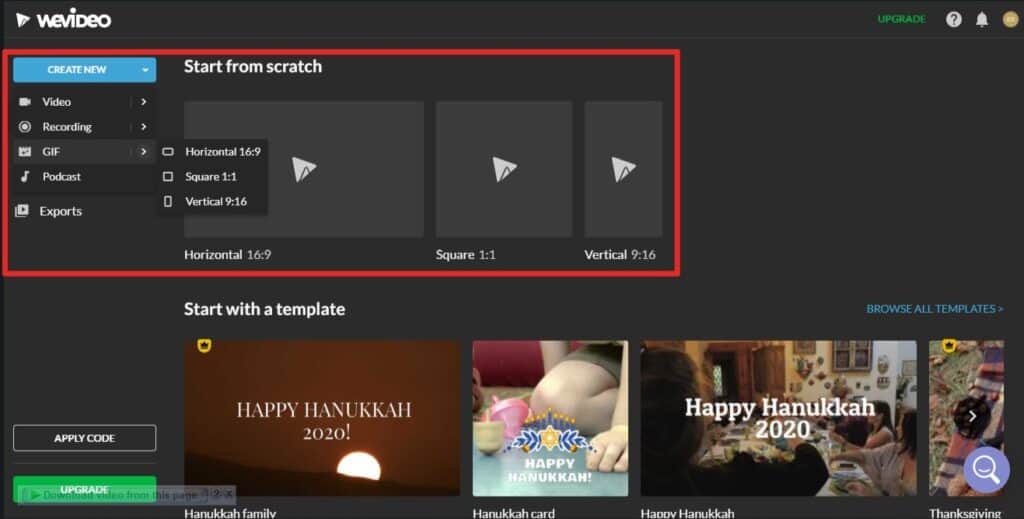
(i) To start creating a design from scratch, you can click on the big squares of the preferred resolution. Alternatively, you can click on the ‘Create New’ button on the top left. The ‘Create New’ button will give you more detailed options that you can do like creating a normal video, recording or gif etc.
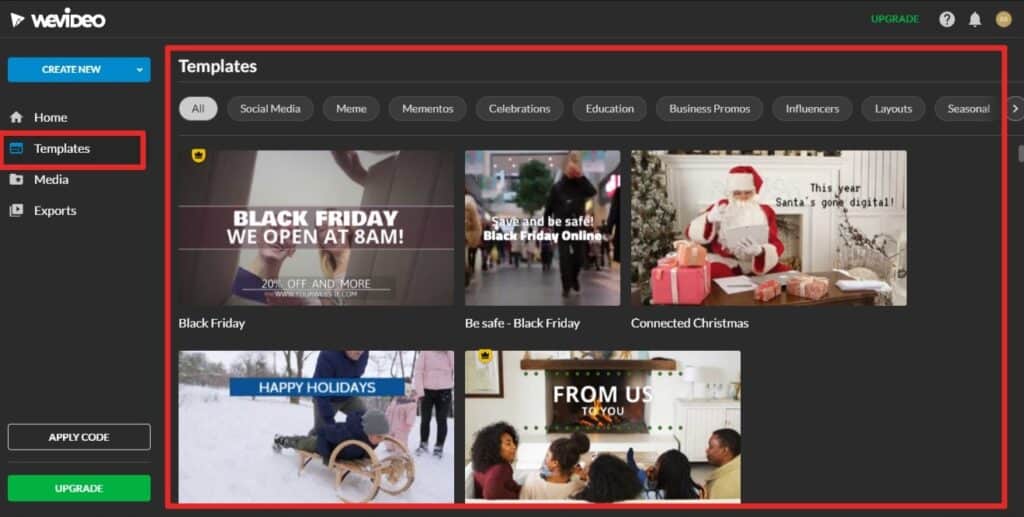
(ii) To start creating a design from templates, you can just go on to the ‘Templates’ section on the left side and choose the best template for your design. Well, browsing templates is very easy with its categories like Social Media, Business, Education, etc. You can preview any template just by hovering your mouse over the template. Then, click to select the template and you’ll be inside WeVideo Editor.
(TIPS) Creating designs with templates is preferred to creating from scratch for beginners because they are easier to use and learn.
2.1 Features in the Editor
Next, let’s have a look at the features in the WeVideo editor.
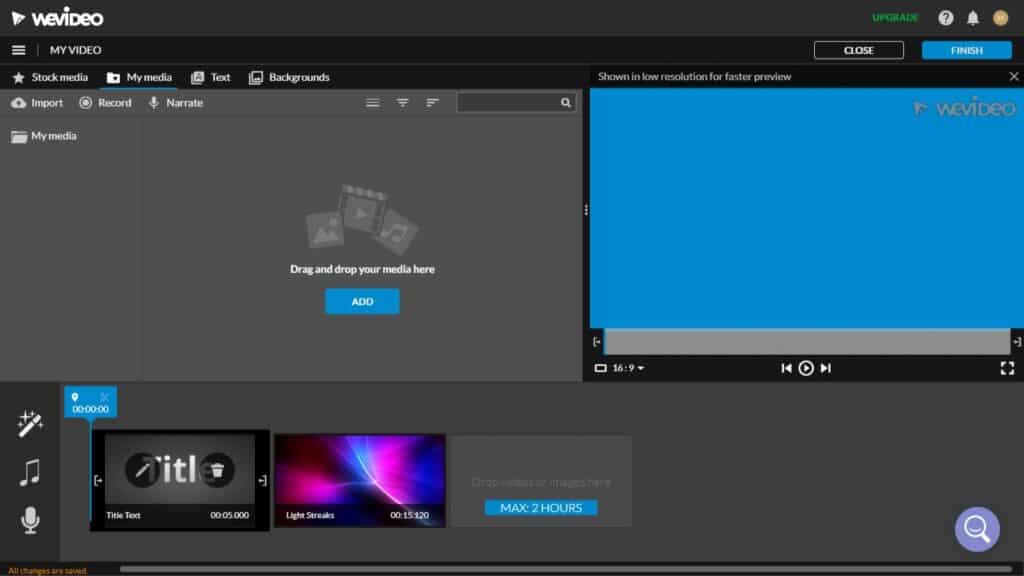
Whichever method use use in (i) or (ii), you’ll be in the same WeVideo editor. This is where you’ll be doing all the editing and designing. If you have previously worked with other cloud-based editors and desktop editors (i.e. those installed in your PC), you’ll notice that WeVideo’s interface is more similar to a desktop editor than the cloud ones.
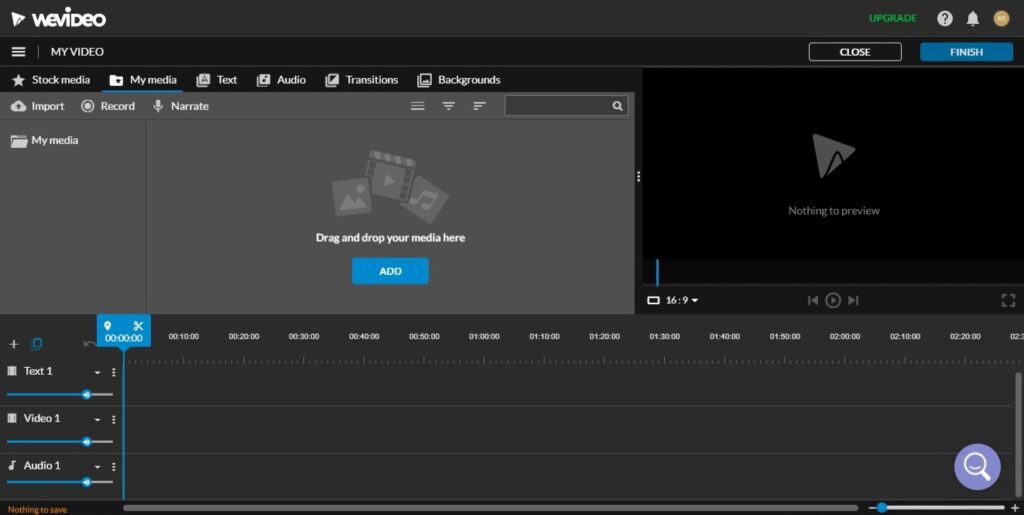
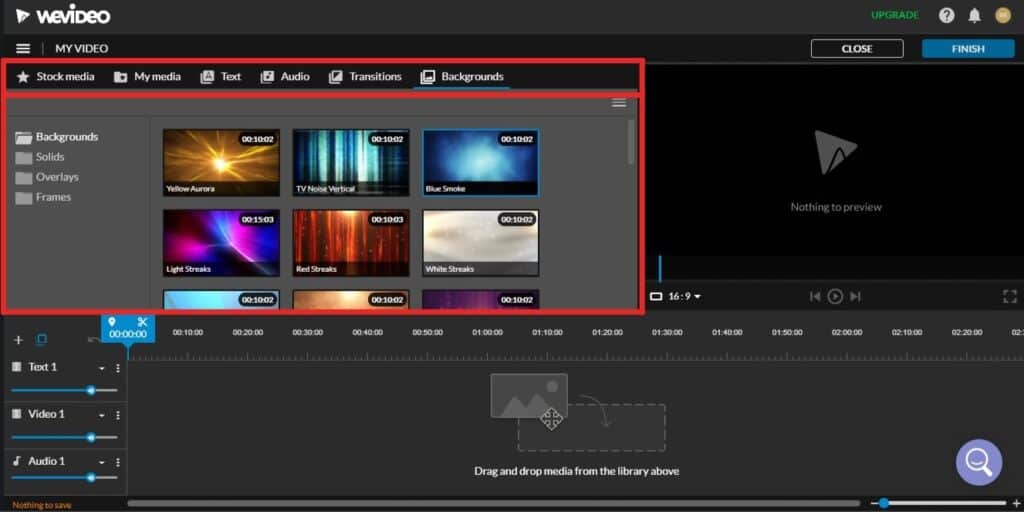
WeVideo editor has a preview or playback screen at the right, the project and media library at the left, and the timeline on the bottom part of the screen.
In the Project and Media Library on the left side, you can find the Stock Library. Clicking on it will open up and let you browse through the collections available. Here, you can also add your own images, clips, and other medias through the ‘My Video’ tab. Similarly, you can add Text, Audio, Transitions, and Background through this section of the editor into the timeline by ‘Drag and Drop’ from the library.
(FYI) The stocks are royalty-free. Although, some of these stock media, text, and other assets are locked for free users and you’ll have to upgrade the WeVideo plan to use them.
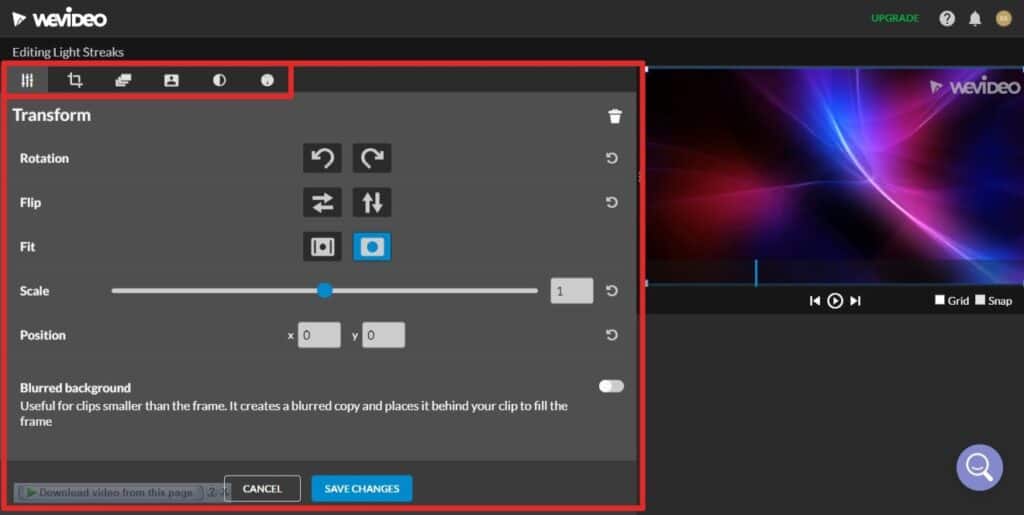
In the Timeline, you can add multiple layers of Clips, Text, Audio, and other media to use in your designs. Additionally, you can also change settings for each layer too! To do any advanced editing, just click the object in your timeline to be directed to the ‘Clip Editor’. Here, you can add effects, change opacity, adjust the size, brightness, and a lot more depending on what is possible with the object. Coming to this, we’re sure you’ll be impressed with the large number of features by WeVideo! So, be sure to try!
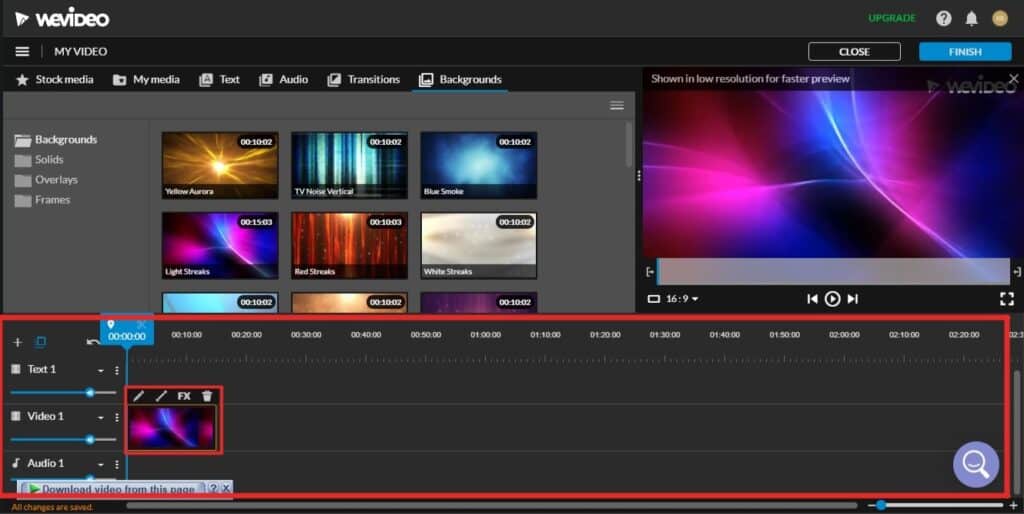
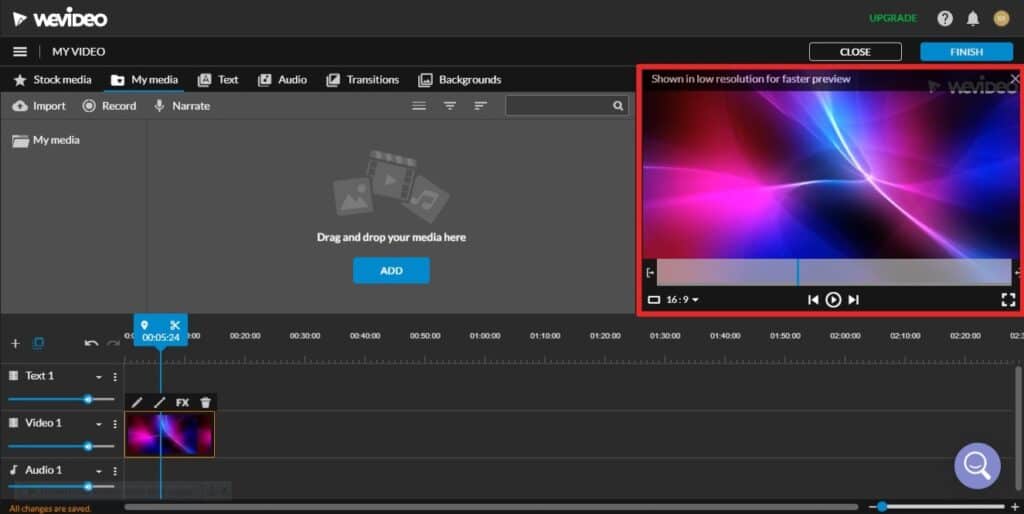
In the Playback panel on the right side, you can preview while editing. Also, you can preview the design in different formats and trim directly from that section.
Here, clicking on the three bars on the top left below the WeVideo logo, you’ll have more options related to your project. Such as creating and opening new edits, and saving project etc.
(TIPS) A good feature to point out here is the ‘Version History’ where you can view and restore previous versions of your project!
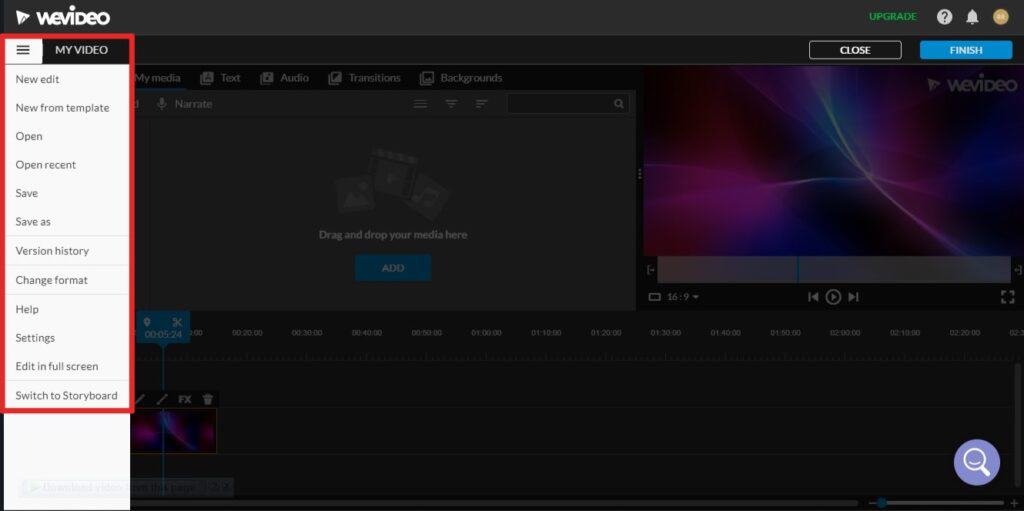
With WeVideo, you can change the format (resolution) of the project you are working on. However, be very careful doing this as this can seriously ‘screw up’ the whole design including the objects inside.
(TIPS) To overcome this, use the ‘Copy and Change’ option instead, that will create a separate project for the changed format. Thereby, keeping your original project safe.

Last but not least, there is a ‘Switch to Storyboard’ function that changes the current timeline editor into a storyboard editor. In storyboard editor, you’ll edit your entire project according to the scenes. So, if you wish to edit your scene in detail, use timeline editing instead.
Well, that was a (little) introduction to the features in WeVideo. We know you won’t be satisfied until you see these features being used. So, we’ll be creating a Story video and a Meme type video (or GIF, you may say) to show you the results!
3. Making a Stories Video
3.1 Select a Template
Stories are long vertical videos generally optimised in the 9:16 resolution. So, in choosing a Stories template, you should browse for vertical ones and select the preferred. However, for our case, we’ll be creating a Stories from scratch. So, head over to the dashboard and click on vertical 9:16 resolution.
3.2 Customise
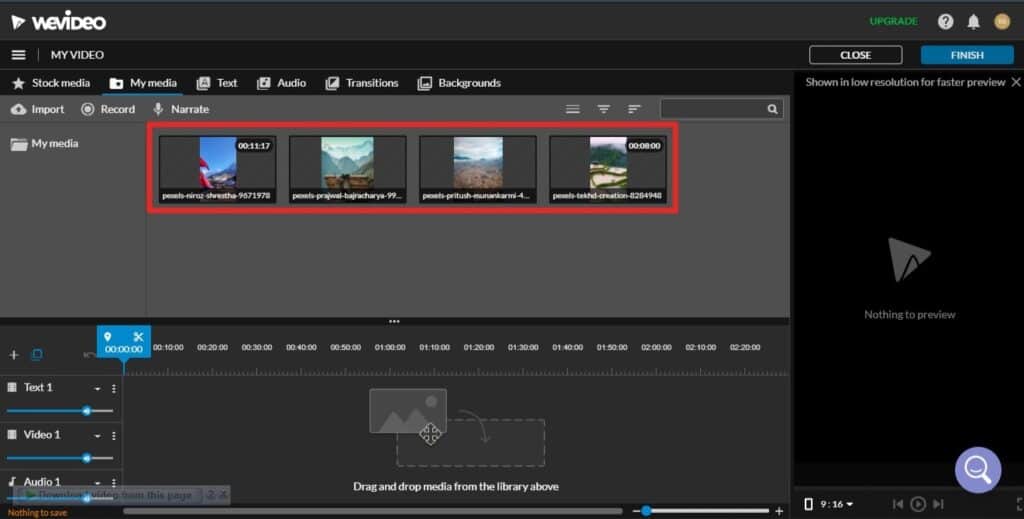
We added our own media and clips to the project just as we are creating from scratch. So, gather all the medias and import them into the ‘My Media’ tab using the ‘Import’ button.
For our Stories, we’ll be putting together some random scenes just to show how editing in WeVideo is done.
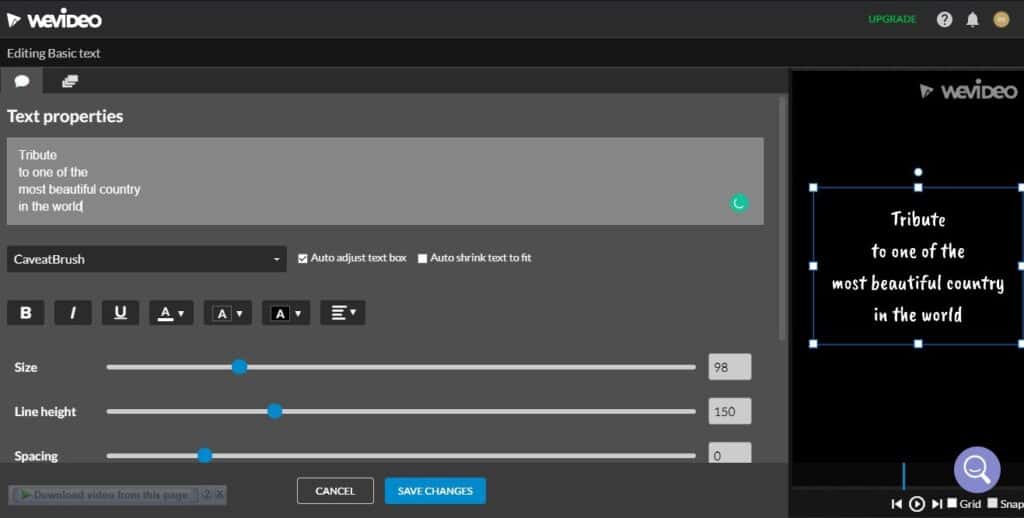
So, we added a text statement (i.e. Tribute to One of the Most Beautiful Country in the World) as introduction aka intro for the video. We do this by clicking the ‘Text’ tab. Then, we type our texts in accordingly and change the fonts and other settings as shown below.
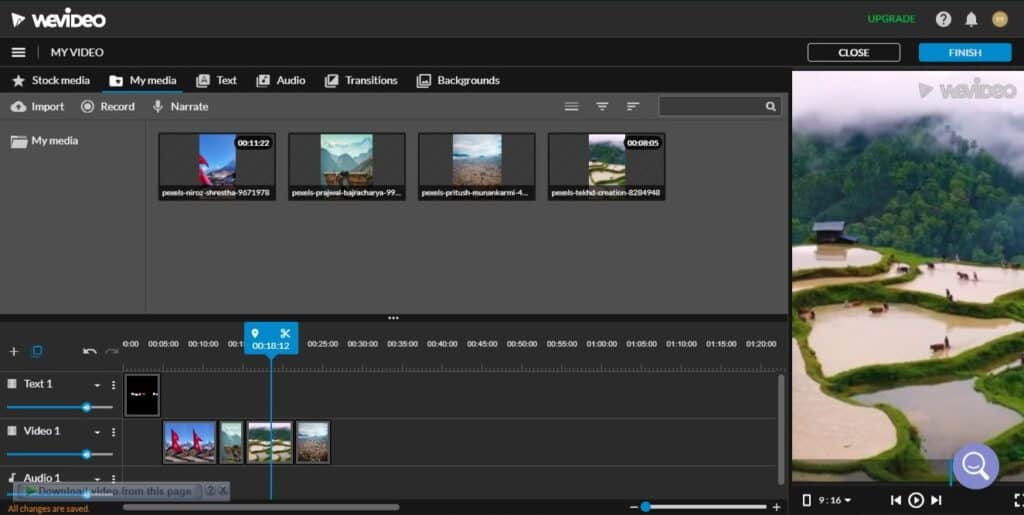
Then, we placed our scenes from the ‘My Media’ tab together into the timeline. Some of the scenes are too long, so trimming is required. We trimmed the scenes and adjusted their duration by selecting the scene on the timeline. Then, dragging them from the edge with the Blue ‘Trim tool’. Each clip can be further edited in detail by double-clicking on them in the timeline.
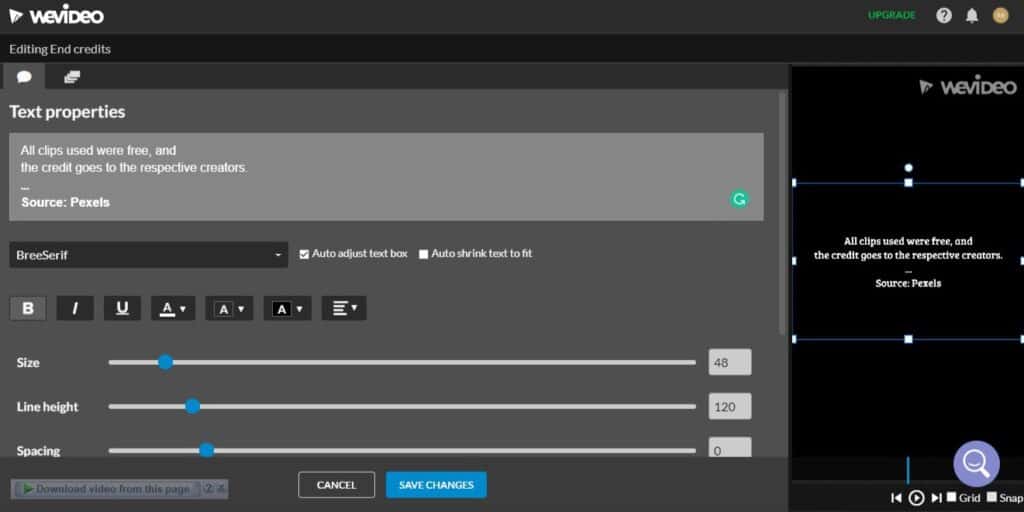
Thereafter, we need to give credit to the owners for using their media files in the last scene. Similarly, we do this by adding texts using the ‘Text’ tab.
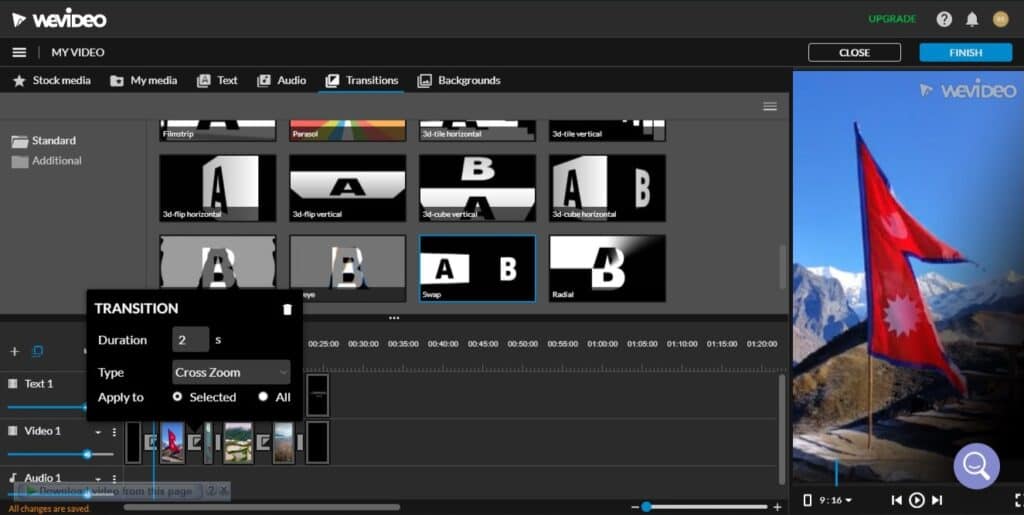
At this stage, our Stories is more or less complete. But wait, or is it? Never ever forget Transitions as these can play a huge role in making your videos stand out! So, we added transitions between scenes by dragging them from the ‘Transitions’ tab. Then, double-click each transition in the timeline to adjust their settings further. WeVideo provides many transitions to use in your clips for free! So, try it out and play around to see how each of them work! For our project, we used a few varieties too, just to show you!
Reaching here, are we done? Anything else is missing? No audio! May Social Media channels including Facebook and Instagram may auto-play without the videos. So, graphics are important. But good videos still need a suitable audio nonetheless. Imagine a video capturing your attention, but when you enlarge it, there isn’t any sound? Not good!
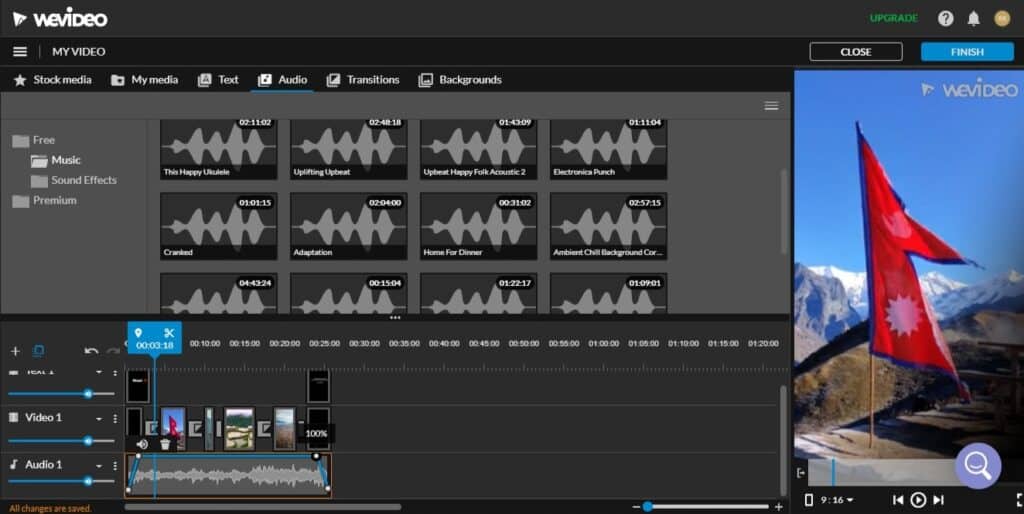
So, here is how to add audio in WeVideo. Go to the Stock Library. Click on the ‘Audio’ tab. Then, select from the list available. Here, we added a sweet short audio to the audio layer of the main video timeline. After which, we adjusted the settings by keyframing in the blue line to create a ‘Fade In’ and ‘Fade Out’ effect for the Stories.
(TIPS) The fade effect is a great way to reinforce the impression of ‘opening’ and ‘closing’ in the video respectively. You don’t necessarily need to start the sound from mute or end with a mute. Just a lower volume will do the trick most of the time. Try it out!
See! Creating videos from scratch is not hard at all in WeVideo as shown in this tutorial. Just a few simple steps and your Stories Video can be done too! Now, it’s time to finalize our video.
3.3 Finalising Our Stories Video
We had done all we can to create our Stories but we’re still not sure if it’s ready to be finalised. Especially when we want to share on social media which have their own best formats. So, it’s time to preview the video. WeVideo doesn’t have a ‘Preview’ button but there is ‘Playback’. So, let’s use it.
Satisfied, or not? No worries, just return and make more revisions if you need! Otherwise, you can proceed to export the Stories video. For this purpose, click on the ‘Finish’ button on the top right. Then, give your video a name. Choose a preferred resolution, and hit ‘Export’. Exporting may take some time depending on the video size and quality. Once export is completed, you’ll be able to download the video onto your pc. The next section, 3.4, shows our Stories video made in WeVideo using the above tutorial steps!
(TIPS) Here, you can export as GIF instead of MP4 too! Useful for making meme which we will be doing in section 4. Also, you can directly share the video to platforms like Google Drive, YouTube, Dropbox, Vimeo, etc.

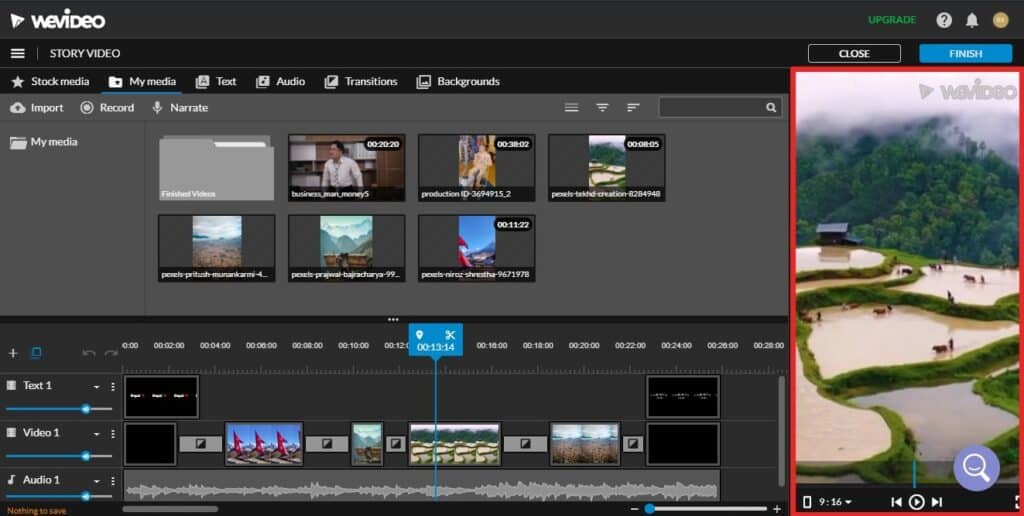
3.4 Our Stories Video
4. Making a Meme Video
4.1 Select a Template
Meme videos are great content for entertainment and everybody loves them. And because so many people love them, they can get as much as 60% organic engagement! So, if you are a Social Media Manager, be sure to include meme in your Social Media Management strategy!
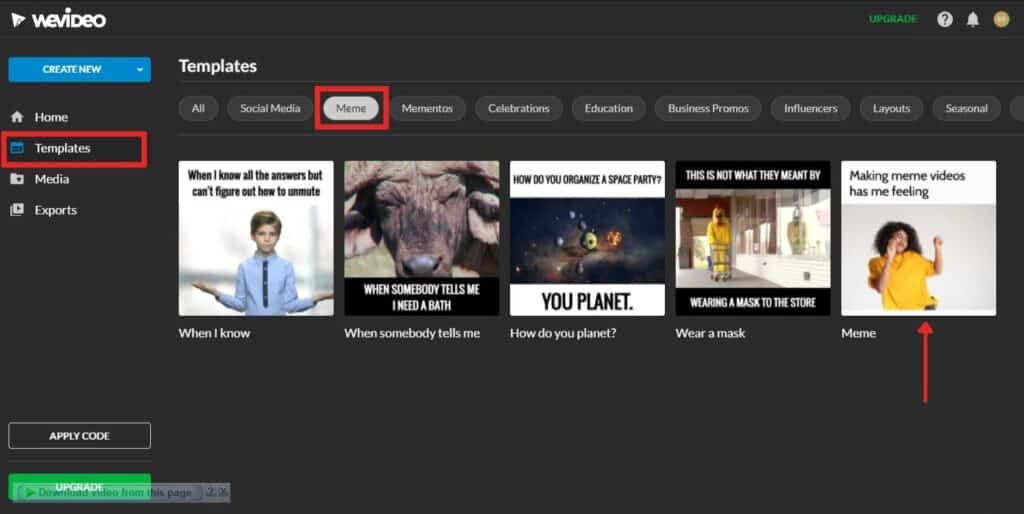
That said, Meme videos can be in any resolution. Although 1:1 square resolution is preferred by most social media channels. Fortunately, in WeVideo, their ‘Templates’ library have a ‘Meme’ section! So, we will just go with that and find what we want.
(TIPS) You can go with any photo or video too, except that choosing a square one will make fitting into the resolution better in the subsequent steps.
4.2 Customise
Unlike creating a design from scratch, customizing a template is a piece of cake. Once you enter the editor after choosing a template, you’ll already see the texts and clips fitted nicely in the meme against the image. Here, all you need to do next is customise the text and replace the clip with your own clip if you need. Simple!
To illustrate this, first we’ll import our clip to the ‘My Media’ tab.
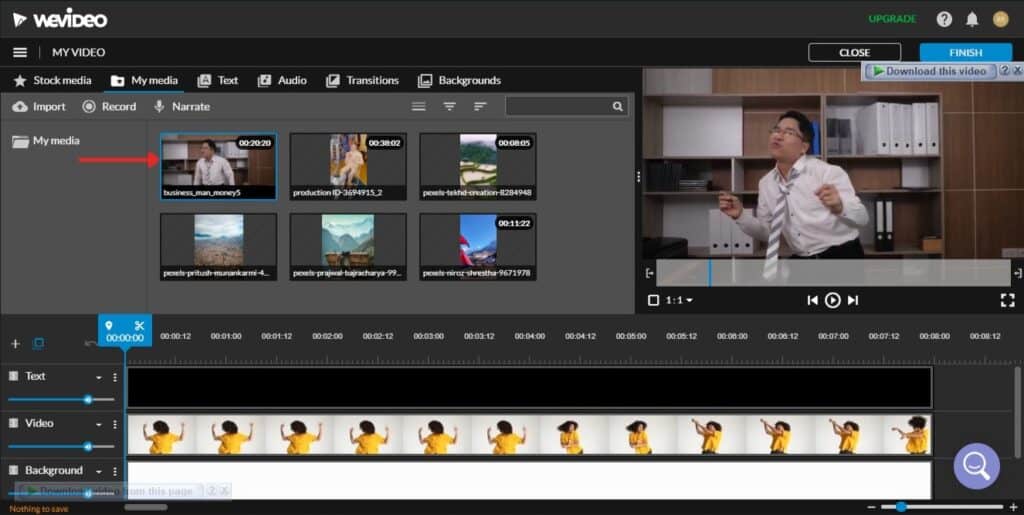
Then, to replace the original template clip, drag our clip from the ‘My Media’ tab over the template clip. That’ll give us the option to replace. Click ‘Replace’ and we will have our clip inside the meme video.

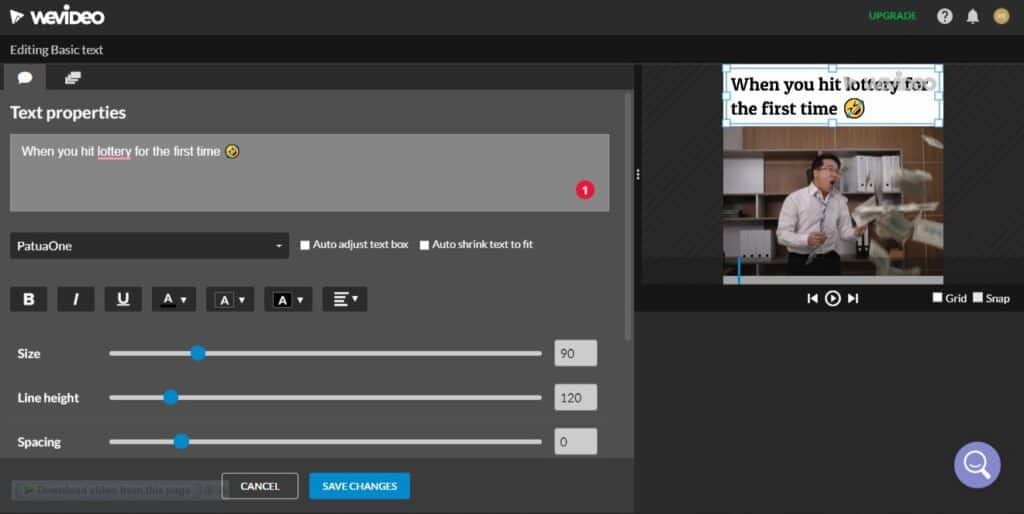
Now, time to modify the text! Double-click on the text in the text layer and edit the text accordingly to desired. Don’t forget you can further adjust the text settings like font, size, colours etc. too!
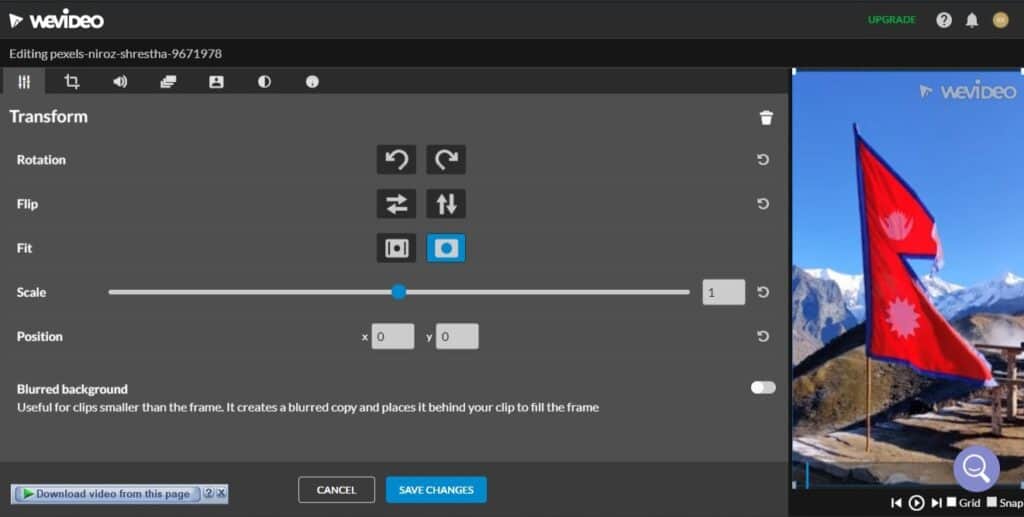
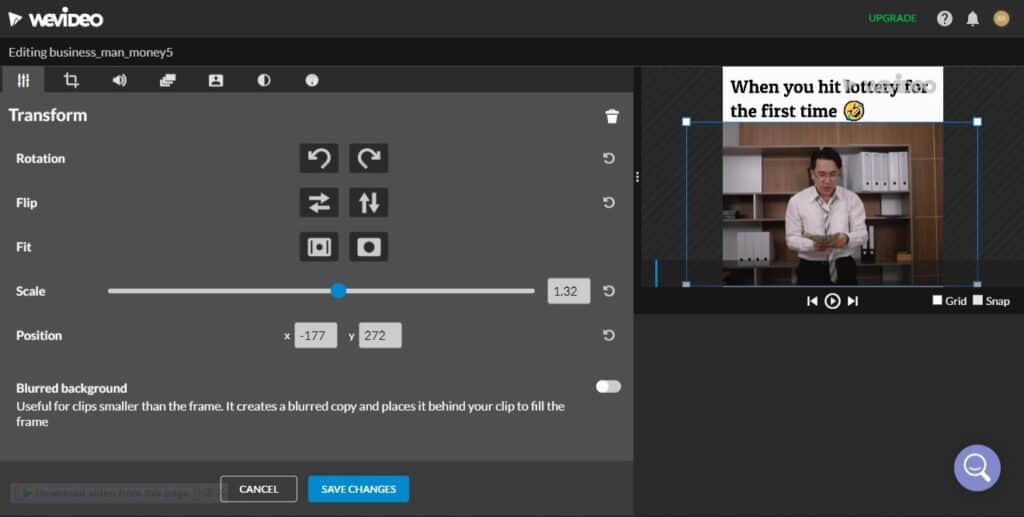
Oh, before we forget, you may wish to adjust your video size or position its fitting. This way, it will eliminate unnecessary areas and look better.
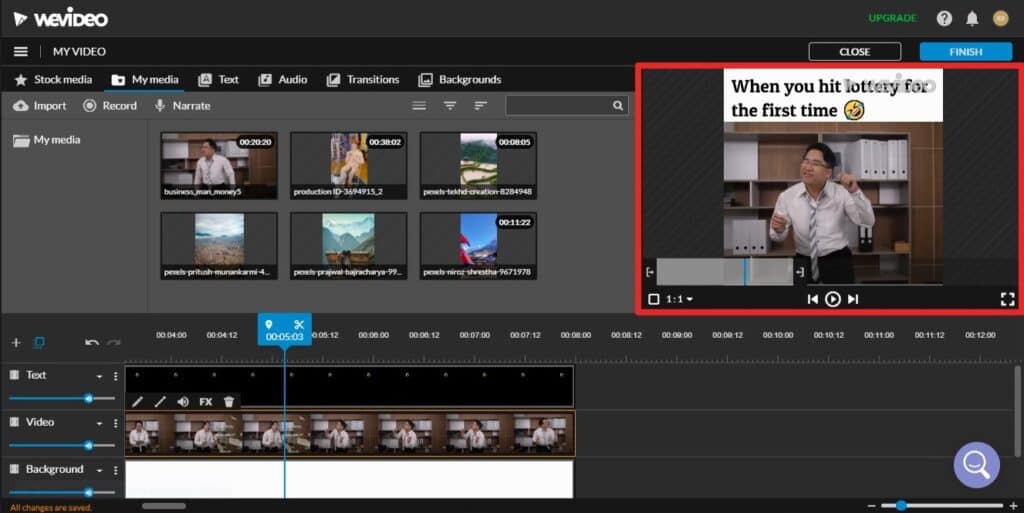
The default template music fits well in this meme, so we’ll let it be. Most meme does not have any sound, but you may still wish to include one in case a certain social media channel can support it. This way, you don’t have to go back to this editor and include the audio. Similarly, to add or replace audio, go to the ‘Audio’ tab. Here, we can also make adjustments like animation, sound effects, brightness, etc. too!
With these tutorial steps, our Meme video is once again ready for preview and finalising in WeVideo.
4.3 Finalising Our Meme Video
Working with templates gets the job done so much quicker and easier. Just a few minutes and your meme is done. Likewise, before exporting, preview the full video in the ‘Playback’ section.
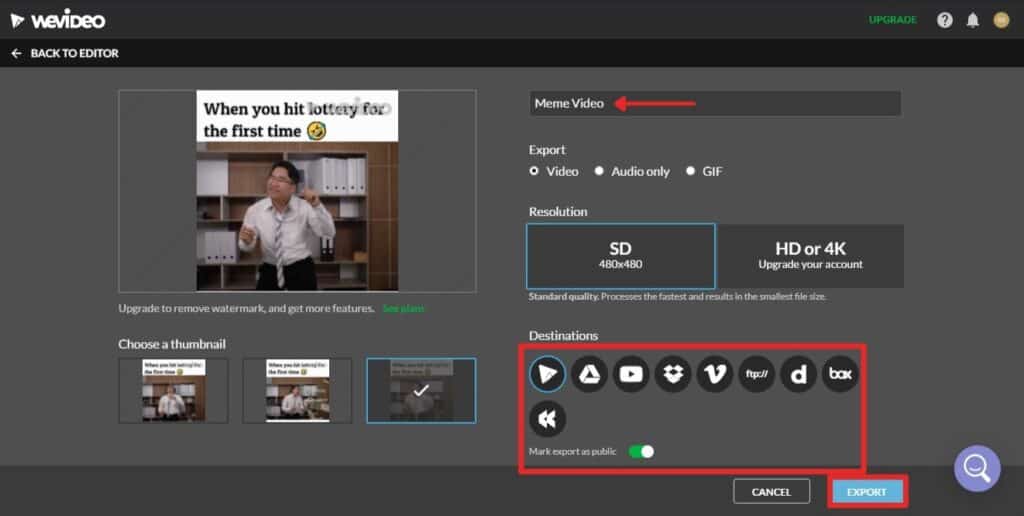
All good? Hit the ‘Finish’ button on the top right and choose the export settings. Then, hit ‘Export’ or ‘Share’ directly to other platforms. Here, we have it! Our very own Meme in the next section, 4.4, made exclusively in this WeVideo tutorial!
4.4 Our Meme Video
5. WeVideo Mobile App
WeVideo is an excellent cloud-based video maker and editor like many others. But as creator, we know you make videos as much as you do on-the-go too! So, we trialed the WeVideo Mobile App (available for both iOS and Android) with our Android phone and here is what we can tell you in this tutorial:
- The free version doesn’t provide many features unlike the web version
- Gets simple editing done in quick manner
- Easy to use with friendly user interface
- Not space and resource intensive (only 60+ mb and runs rather smoothly)
- Able to upload to YouTube and Share directly to some apps
Want to know more about the WeVideo Mobile app? Click Here.
Final Comments
In this age of social media, anyone can be a creator! Start by picking a video maker like WeVideo. It is free to use and so easy to as shown in this WeVideo tutorial! With a powerful video maker such as WeVideo, you can make all sorts of videos that can expand to online ads, tutorial, and recorded webinars too! Don’t fret that you can’t start video marketing because you can! Fret when you don’t know which video maker to use! So, here is WeVideo to try!

Activities
What videos do you think you wish to make with WeVideo after reading this tutorial? Tell us with a COMMENT below.
LIKE & SHARE this article with the world of social media!
HASHTAG #DonutAtwork
Like content creation? Here are some Tags to read next: Creative Development | Personal Productivity | Social Media Management