Animoto Video Maker Tutorial to Making Tutorials (& List Videos!)

Animoto is an online video maker that allows anyone to create attractive videos easily and quickly. By anyone, we mean anyone from elementary student to the silver generation. Best of all, Animoto is free to use! Limitations applies for free plan of course, but you do get a bunch of features to kickstart your video creation journey. So, would you need Animoto for business or your own social media? In this article, we detail the steps anyone can use to make any videos in Animoto. In fact, we did two videos with this tutorial; a tutorial one (that’s right!) and a list video. So, let’s not go lengthy further and read on!
The world wide web is huge, and yet you had stumbled on my site looking for something. I hope you find it as we had taken huge efforts to create them. Best of all, its FREE! Hence, some of our content may include affiliate links (i.e. whenever you click on the links and purchase, I earn a small commission at no extra costs to you!). No worries! Some of these links may look like phishing, but I assure you they are not! Lastly, the affiliation does not affect my reviews towards them. Enjoy!
1. Getting Started with Animoto
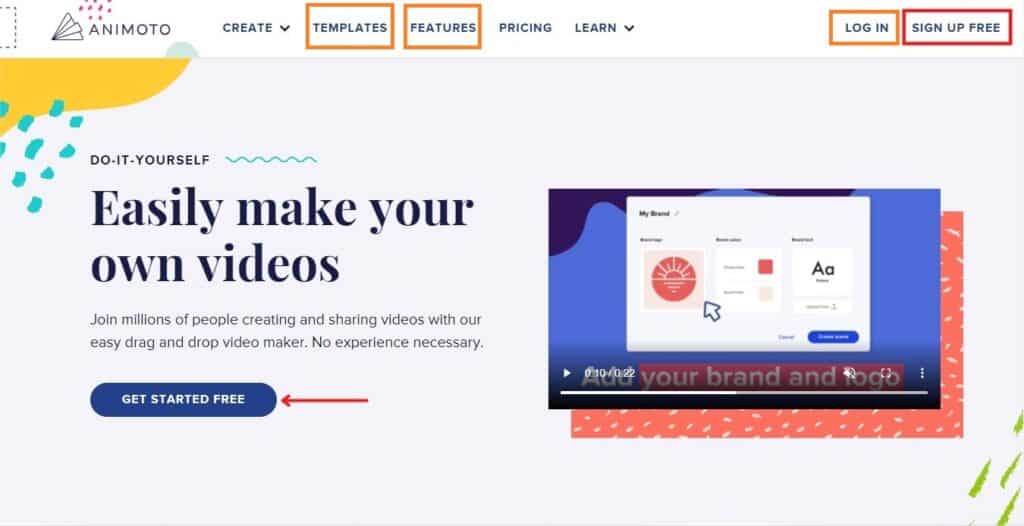
To get started, visit the website at www.animoto.com. You can browse their site and see for yourself what they offer. Particularly, you should check out their ‘Features’ and ‘Templates’ tab. Once you have an idea of what Animoto video maker can do, head over to sign up a ‘forever free’ account with the ‘Sign Up Free’ or ‘Get Started Free’ button. Even better, if you already have an account, just ‘Log In’.
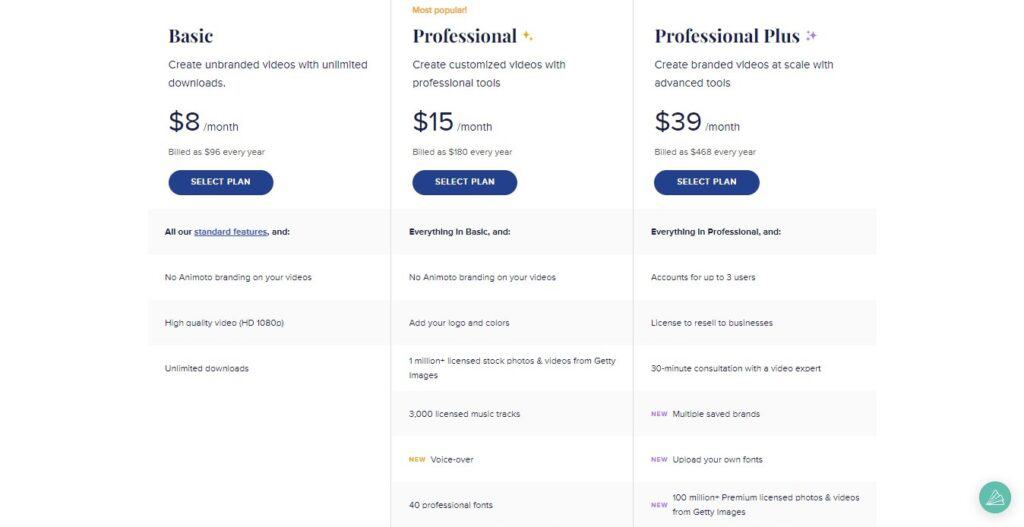
The free plan is basically really just for testing and trying out Animoto. Why we said so is really due to the output videos having the watermark of Animoto logo. Other than that, you can make 720p resolution videos with unlimited sharing to certain social media channels. At the pricing page, you can know more about what is offered with the respective plans and decide later if you need to subscribe.
So, after you log into your Animoto account, you’ll be redirected to a page full of templates. This’s where you can start selecting one and start making your video.
2. Select a Template
Animoto has hundreds of pre-made templates to choose from and to make all kinds of videos. In Animoto, you can also create videos from scratch with the ‘Start From Scratch’ button on the top-right but it’s not recommended for newbies and beginners. Afterall, templates are what make online video maker like Animoto easy-to-start and beginner-friendly.
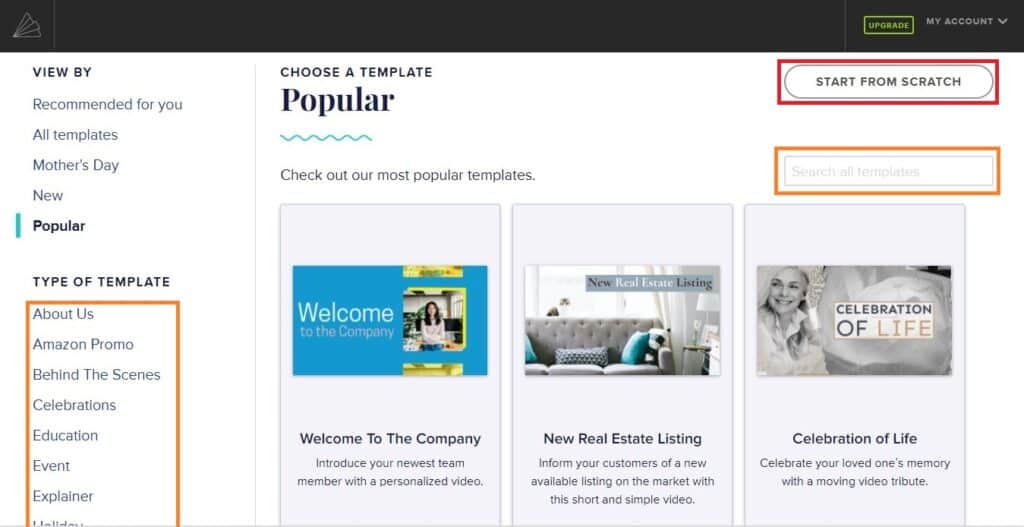
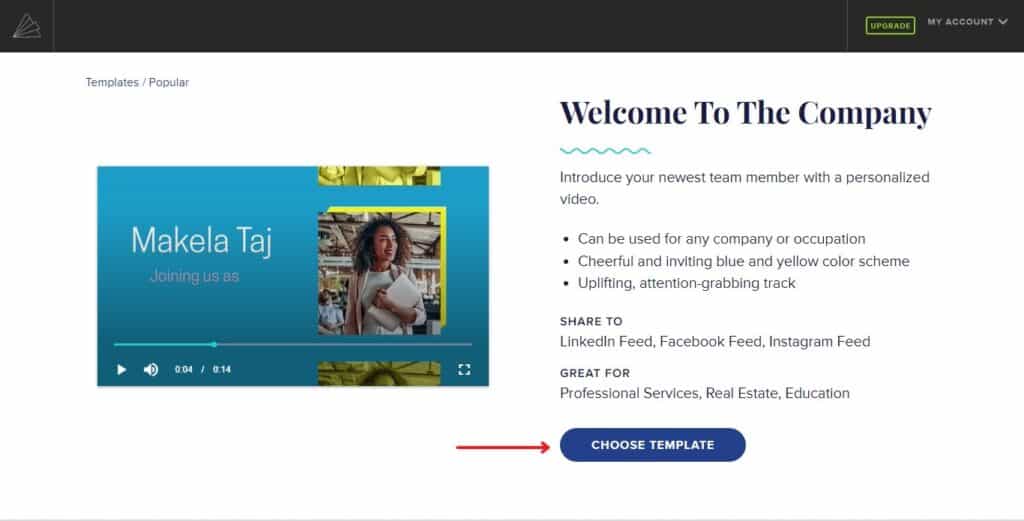
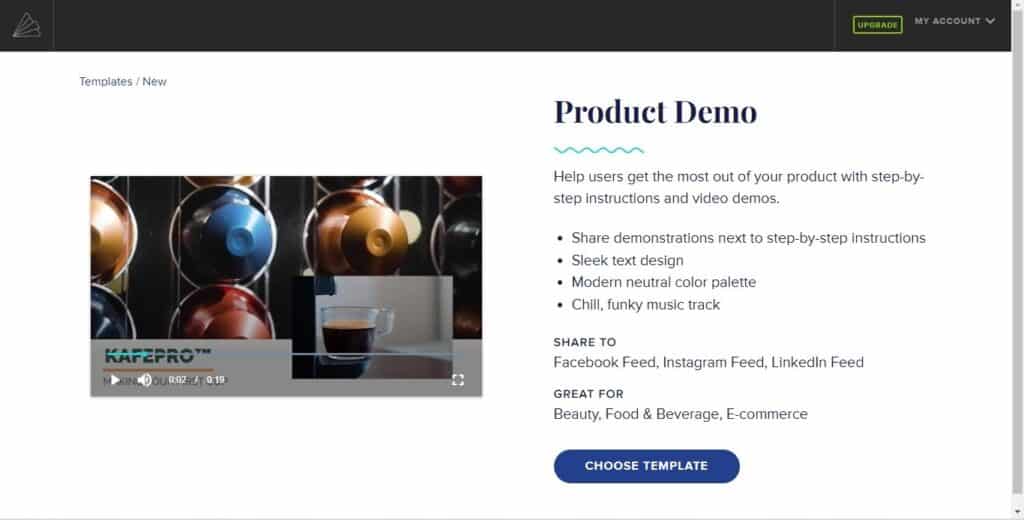
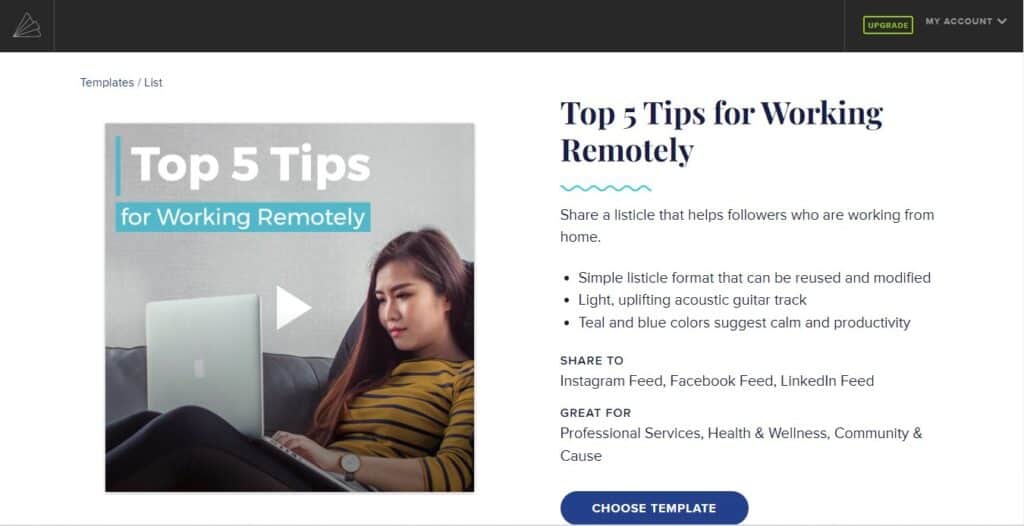
So, first of all, you need to choose a template suitable for the video you want to make. We say ‘suitable’ as you must first know what layouts, and elements for your videos you need and find a template containing these as much as possible. You can browse from the categories on the left-hand panel or you can just search for them using the search box. Then, click on the template you’d like to work on. After that, you’ll be shown a preview of the template and other descriptions. Click on ‘Choose Template’ and the system will automatically create a new project and redirect you to the Animoto Editor.
3. Customise
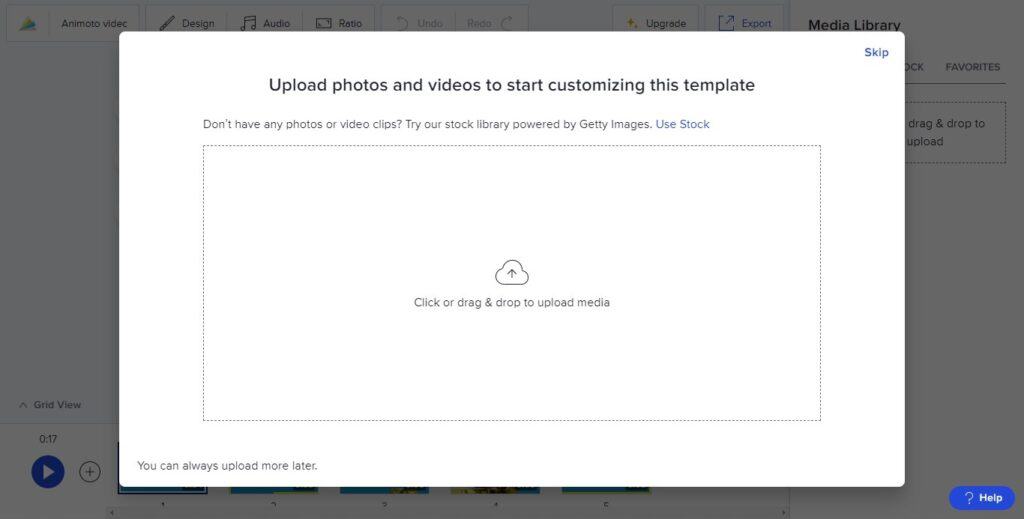
Once in your newly created Animoto project, you might be asked to upload photos and videos to kickstart customisation. However, we can upload any media later on so we can skip this for now.
3.1 Editor Tools
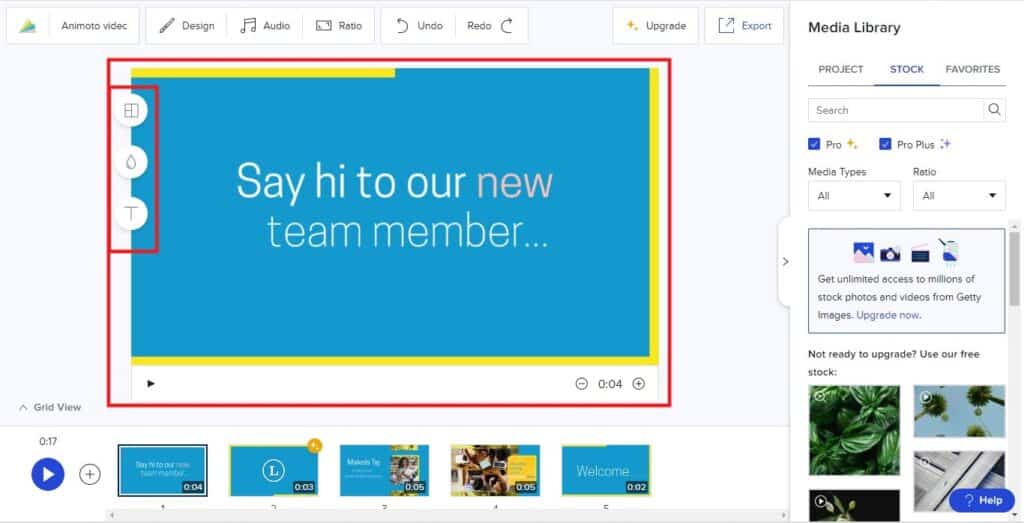
As you may realise, the editor in Animoto is really straightforward. It has a big Playback/preview screen at the center, Media Library on the right, Timeline section on the bottom, and Designing tools on the top.

In the playback screen, you can play the animations of your design as well as rearrange, position, or edit different elements of the video (i.e. Text, Images, Videos, etc.). There are also options to add text, change colors and edit the layout of the selected block.
(Comments) Unfortunately in Animoto video maker, you cannot freely move images or videos on the canvas to any area you want. You can only add media files to the specified section of the layout. Also, the layouts in Animoto are a bit limited. While these are downsides, it can also mean lesser complexities for beginners.
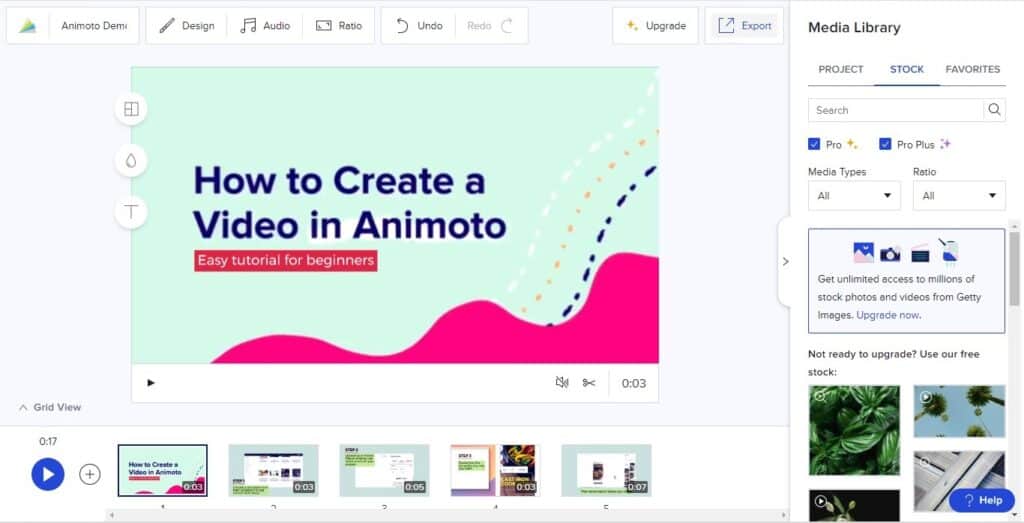
In the Media Library, you can access all the media to use in the project. That is, including manually uploading fonts, images, etc. from your devices into the project, and use stock images and videos from Animoto’s library. Above all, it is very easy to find what you want using the search tools and filters.
(Comments) Free accounts do not have access to the huge collection of royalty-free creatives from Getty Images so if you need, upgrade with a subscription.

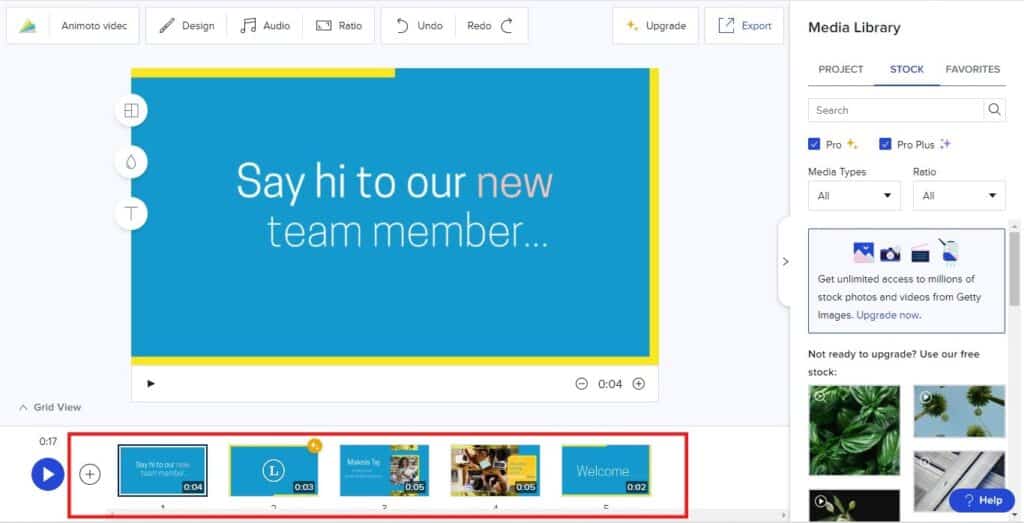
In the Timeline section at the bottom, you’ll find all the slides that make the overall video. Through the Timeline, you can add, delete or duplicate slides as you wish. Selecting any slide will open it up for edit and preview using Playback. You can also rearrange slides by dragging them across others.
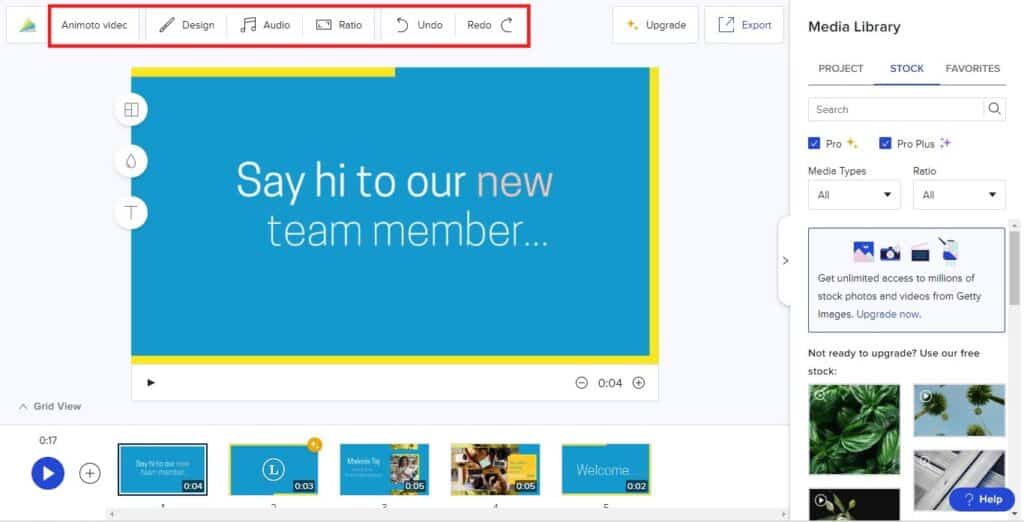
In the Tools section at the top, there are various design and essential tools. This section is where you can change the name of the project, aspect ratio, undo and redo changes, as well as, add audio to the project. Last but not least, you can access even more advanced tools and settings inside the Design tab.
3.2 Common How-Tos
Section 3.1 details a brief overview of the Animoto editor. However, just that won’t be enough, so we provide a guide to some of the most common how-to in any design work in this section.
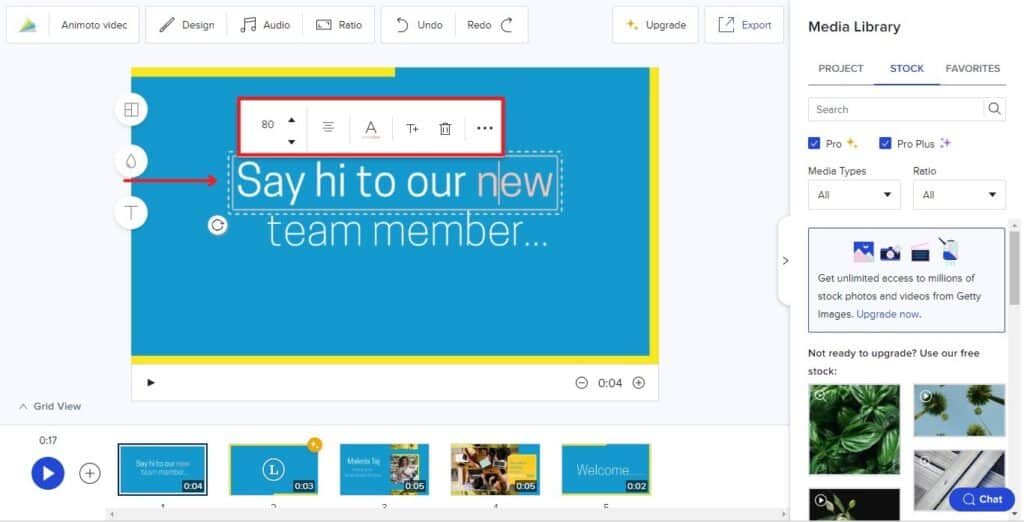
Edit Text: double-click on the text and edit it. You’ll also have the option to change text size, color, alignment, position, etc.
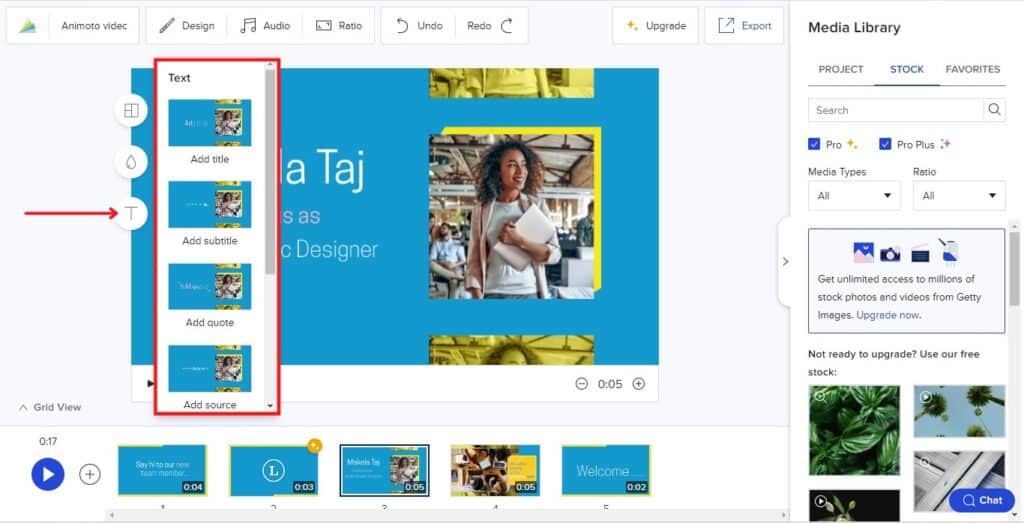
Add Texts on Other Timeline: First, select that timeline slide and click on the text icon on the left side of the preview area. Then, choose the text style or layout and edit accordingly.
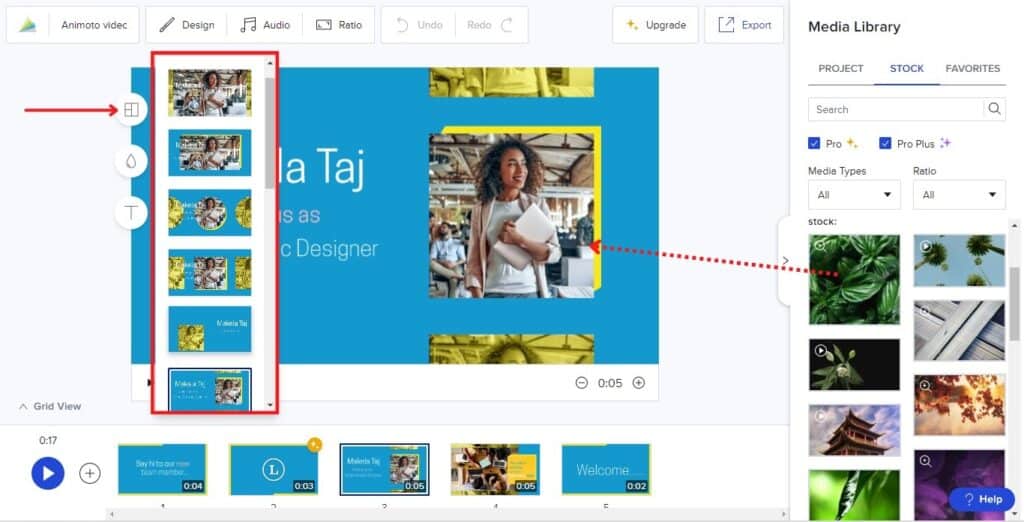
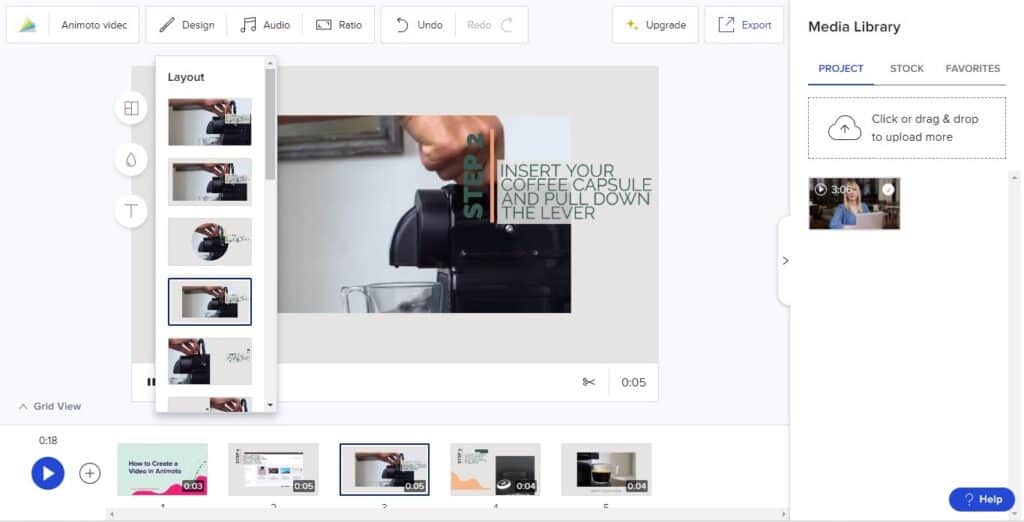
Add/Edit Media: Click on the layout icon on the left side of the preview area and choose the layout you prefer. You can only add the images/videos to specified sections in the layout, so choosing the proper layout is important. Then drag and drop the media file from the media library to that specified section. If there was already another media, then it will be replaced. You can scale, position, rotate or delete the media by clicking on it
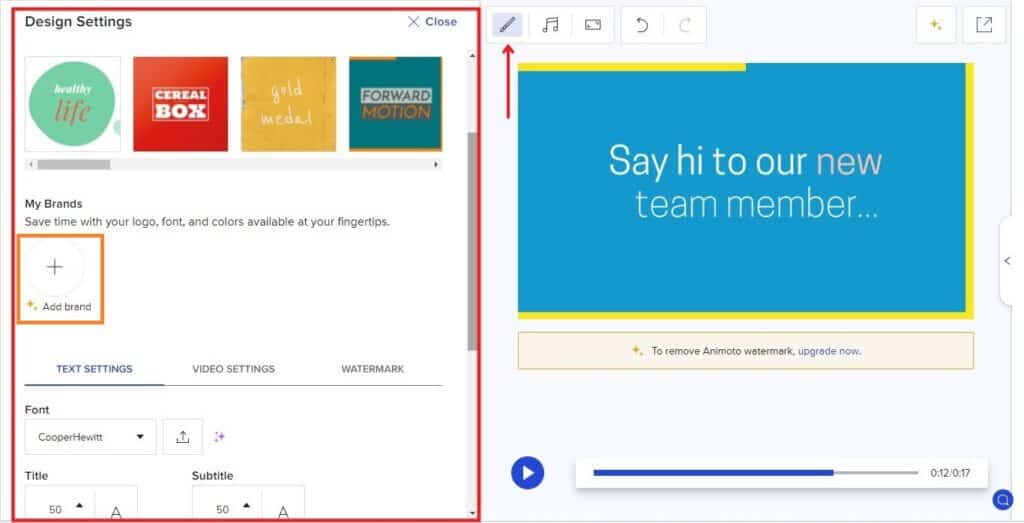
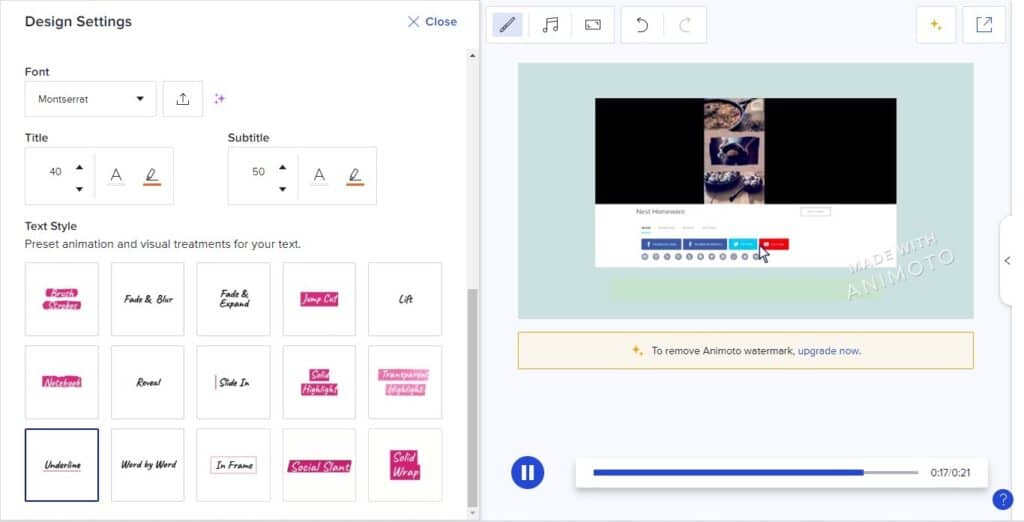
Change Theme of the Video: Click on the ‘Design’ button on the top and more advanced settings will appear. Then, you can one-click change the overall theme of the video with ready settings or your own saved settings. Settings like font type, colors, styles and video transitions, filters, colors etc. can all be applied one-shot. Alternatively, you can change each setting manually and save them as your theme via ‘Add brand’.
Nonetheless, there are always many things to learn but some are better learned from experience. Hence, we’ll make two videos in this tutorial, specifically a tutorial and list video, to illustrate designing with Animoto.
3.3 Making a Tutorial Video
For the tutorial video, we’ll be making a video titled ‘How to create a video using Animoto’. We conceptualise this to be a quick step-by-step style video. So, we search for suitable templates and decided on one named ‘Product Demo’.
Firstly, we changed the aspect ratio of the project to 16:9, followed by the layouts of every timeline in the project.
(Tips) Building the structure is always the first step in designing. If you do all the customizations first and then change the structure, your design will likely not blend in well and certain animations will not flow. Regards to resolution of the video, know where you wish to publish your video and change it to the most optimized resolution (e.g. FB, LinkedIn, Twitter). We suggest this Link for social media sizes guide.
Now that we had our structure ready, we can add our own creatives to the template. So, we uploaded ours and replaced the stock ones. Then, we edited the text and other content on every timeline of the project. We also removed some slides from the project and made new slides that flow with our video.
Finally, we customized the theme and other animations. That is, font type, sizes, styles, colors, video styles, and transitions were all changed according to our preferences. Then, we added audio to our project through the ‘Audio’ button.
(Tips) Choosing suitable audio is an art too! Is it a relaxing background music you want? Or a slow calming one? Whichever one you want, note that certain music may have certain usage rights and not monetizable by certain channels (e.g. YouTube). In this case, just change accordingly.
Within an hour or so, our first video is done! View it in Section 5 ‘Our Finalised Videos’.
3.4 Making a List Video
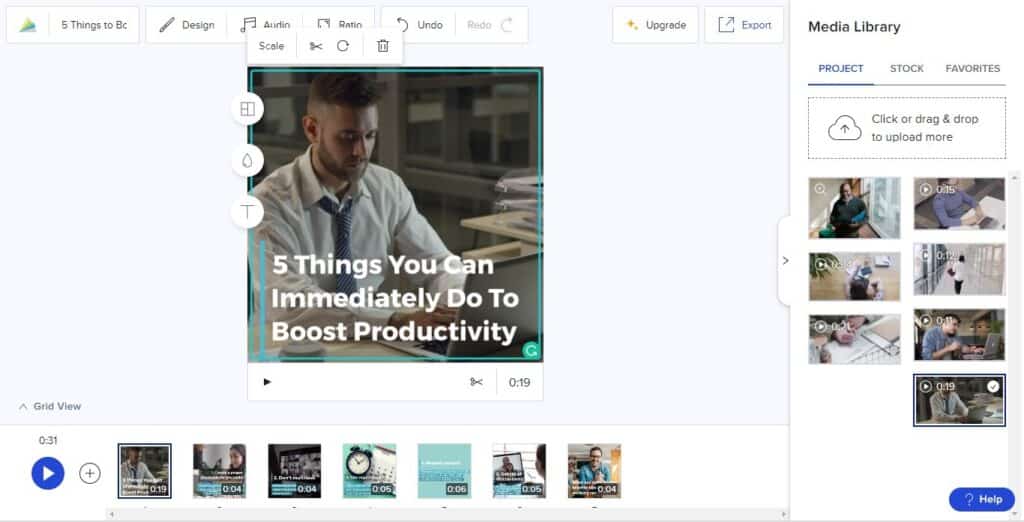
For the second video, we’ll be making a listicle video on ‘5 Things You Can Immediately Do To Boost Productivity’. After browsing within minutes, we got a suitable template in ‘Top 5 Tips for Working Remotely’.
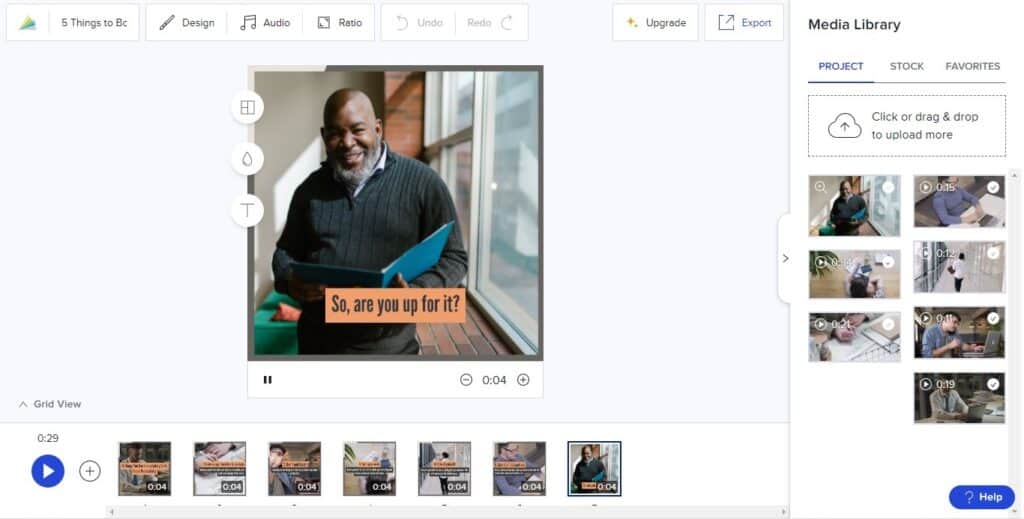
In similar fashion to the first video, we first changed the resolution of the project and layouts across different slides in the project. Then, we replaced the media files of the template with our own and edited the content. After which, we customized the theme by tweaking the text and video settings to the feel we like. We didn’t include any references this time as the tips came mostly from our general knowledge. If you need, just add texts.
(Tips) Be sure to take the time to browse around the various design tools and settings available. You can surely get creative in Animoto! If you face any issue in designing, re-visit Section 3.1 Editor Tools and 3.2 Common How-Tos. If not, post your comment below this article and we’ll be happy to help!
As simple as repeating the similar steps, we have our second video ready to be finalized and exported. You can see this video too in Section 5. But first, read on for Section 4 for finalization tips!
4. Finalise Design
After performing any customization, it is natural to preview it. So, if we only want to preview a single slide, we can do so by selecting that slide and then clicking the play button on the Preview area. Of course, we can also preview the whole video using the big blue play button on the bottom left corner.
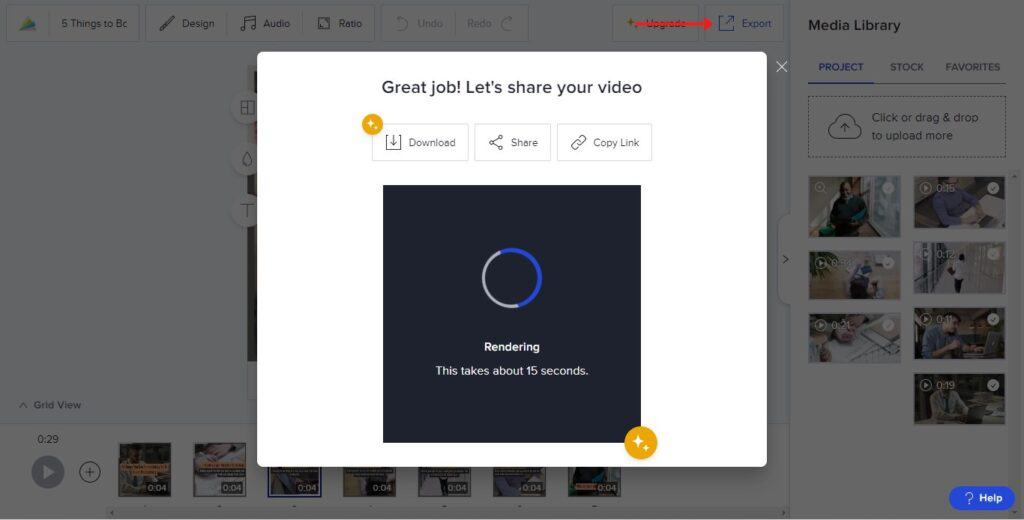
Is your design ready yet? We surely hope it is. If not, just go back and edit. Now, let’s export it to our device with the Export button at the top right. After some rendering, depending on the size of the video, we can download it or share it to social channels or via URL link. Isn’t this convenient?
5. Our Finalised Videos
Final Comments
Animoto, like most other online video maker, are not hard to use, nor expensive. They come with ready full video templates for making any kind of videos for any sort of purposes. Think video marketing is a myth for your business? No longer! Try Animoto with a free plan and you’ll realise the world of marketing and digital advertising possibilities opening up for you! The thing is; are you up for it? There is hard work, but everything becomes easier with time. Go try!

Activities
How will list or tutorial videos work for you? Tell us with a COMMENT below.
LIKE & SHARE this Animoto Video Maker Tutorial so the world can all make better videos!
HASHTAG #DonutAtwork
More content making? Try these Tags: Creative Development | Personal Productivity | Social Media Management