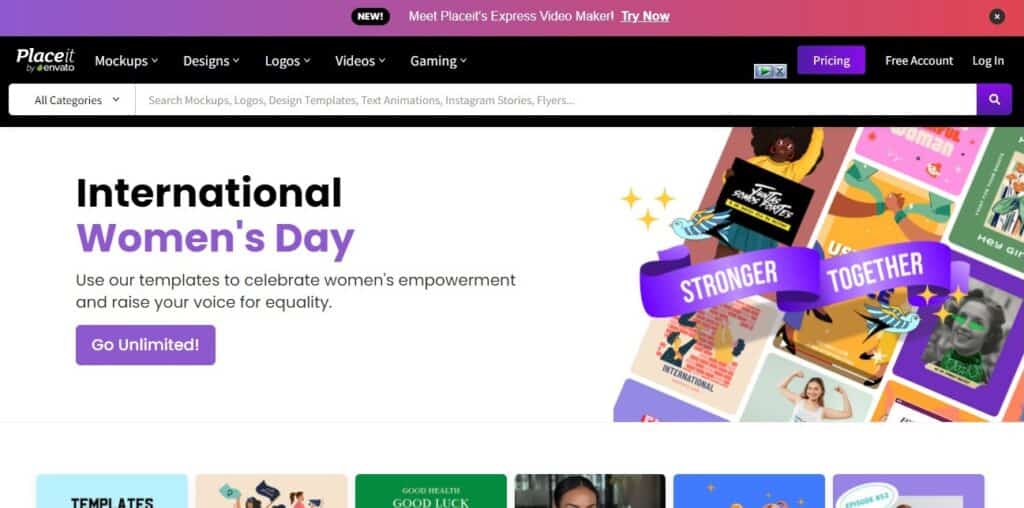
Use Placeit Free to Make All Sorts of Mockups. Here is How


Placeit by Envato is an easy-to-use, template-based online platform for creating designs and mockups. It is used to create social media posts, banners, logos, videos and other gaming-related design work. However, there’s lots of online tools for these such as Canva and FlexClip. So, for this article, we’ll only be using Placeit Free to make mockups, which is an offering more exclusive and that it has over 39,000s of templates of.
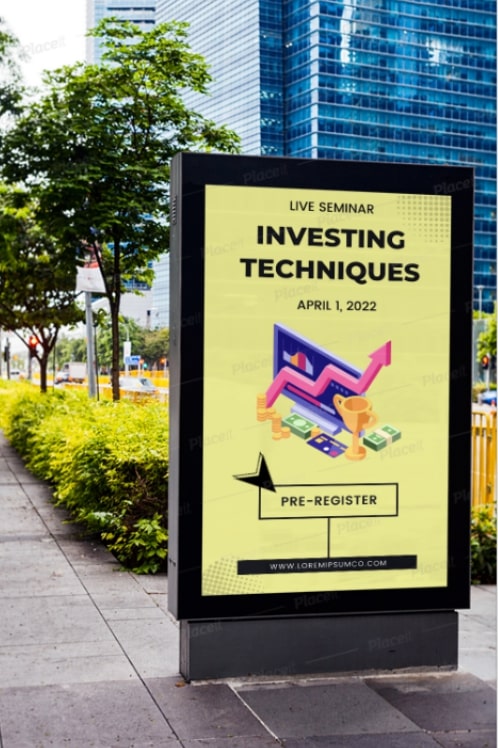
For our tutorial, we’ll use Placeit free to make a mockup for a standing roadside billboard. Being able to do so is of great use to advertisers and marketers to visualize their campaign. Of course, you can use Placeit free to make other types of mockups too which we’ll discuss in Section 6. Without further, let’s go!
The world wide web is huge, and yet you had stumbled on my site looking for something. I hope you find it as we had taken huge efforts to create them. Best of all, its FREE! Hence, some of our content may include affiliate links (i.e. whenever you click on the links and purchase, I earn a small commission at no extra costs to you!). No worries! Some of these links may look like phishing, but I assure you they are not! Lastly, the affiliation does not affect my reviews towards them. Enjoy!
- Getting Started With Placeit
- Select a Template
- Customise
- Finalise Design
- Our Final Output
- What Other Mockups Can You Make With Placeit?
1. Getting Started With Placeit
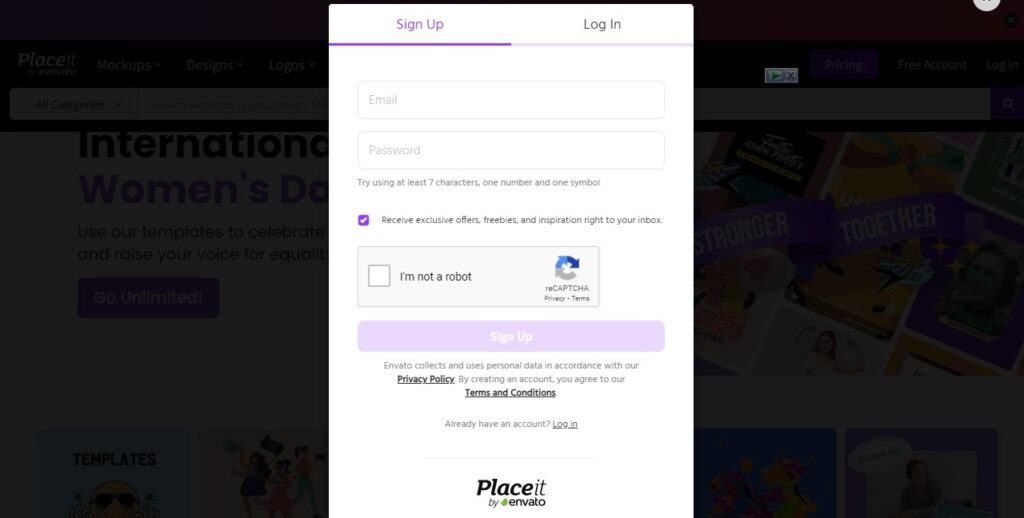
To start using, just go to https://placeit.net, sign up and log in to your account. Yes, no application download to PC is required. Placeit is free to use although to take advantage of its full list of templates and features, you can consider a paid subscription. Pricing begins from US$ 14.95 per month by the way!
Creating a free account is very simple. On their homepage, click on the ‘Free Account’ button at the top right corner and sign up using your email. Thereafter, you’ll logged in automatically.
(Comments) At this early stage, there’s no harm to navigate around Placeit’s website on your own. So, get going! You won’t be lost, and it will give you a huge boost as we go along in this tutorial!
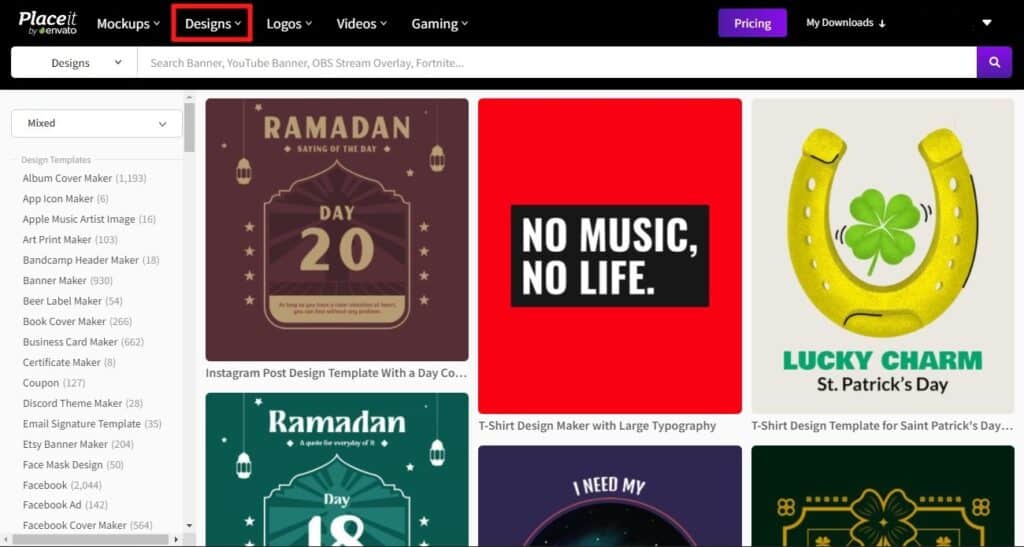
2. Select a Template
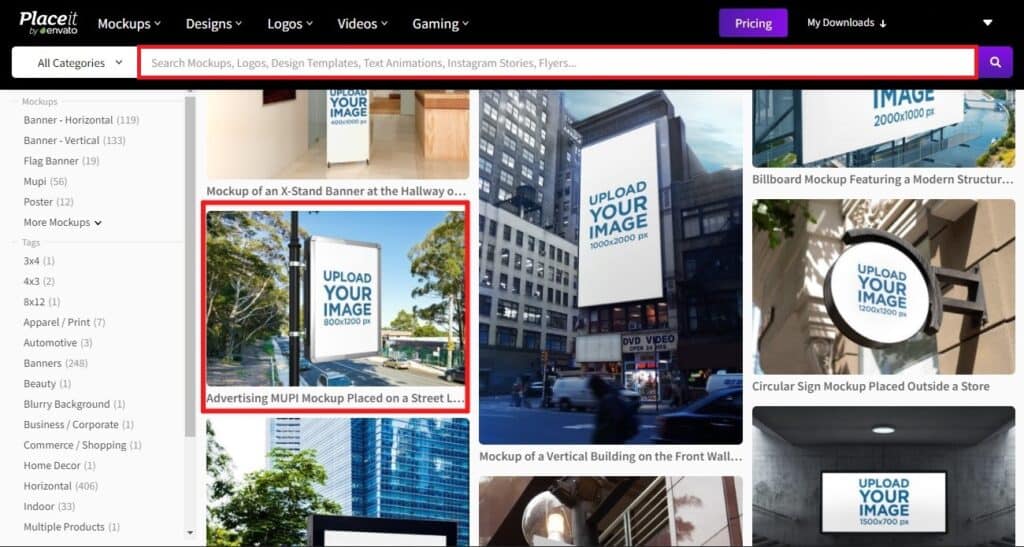
As previously mentioned, Placeit is template-based, which is good since it becomes easier to start and finish. Although it does have an option to start with a blank canvas. Nonetheless, as we are using Placeit free, our access to all templates is limited. Here’s where you can find all the free templates for use: https://placeit.net/free-templates
(Comments) Freemium tools are always a great way to try out before buying. Don’t go soft on free use! Make full use of it and explore as much features as possible! Then, you’ll know if its worth it to buy.

Here, you can browse templates by categories like Mockups, Designs, or you can just search directly by keying into the search bar. There are also additional filter options that help you find your perfect template. So, after finding one you like, click on the template to be taken into its editor.
(Comments) You can ‘Preview’ a template by hovering your mouse cursor over it. Moreover, you can also ‘Save’ them to for later use by clicking on the ‘Heart’ 🤍 symbol.
3. Customise
There’s two parts to this section where we’ll explain the interface of the Placeit editor first for general understanding, followed by the step-by-step editing tutorial.
3.1 Placeit Interface
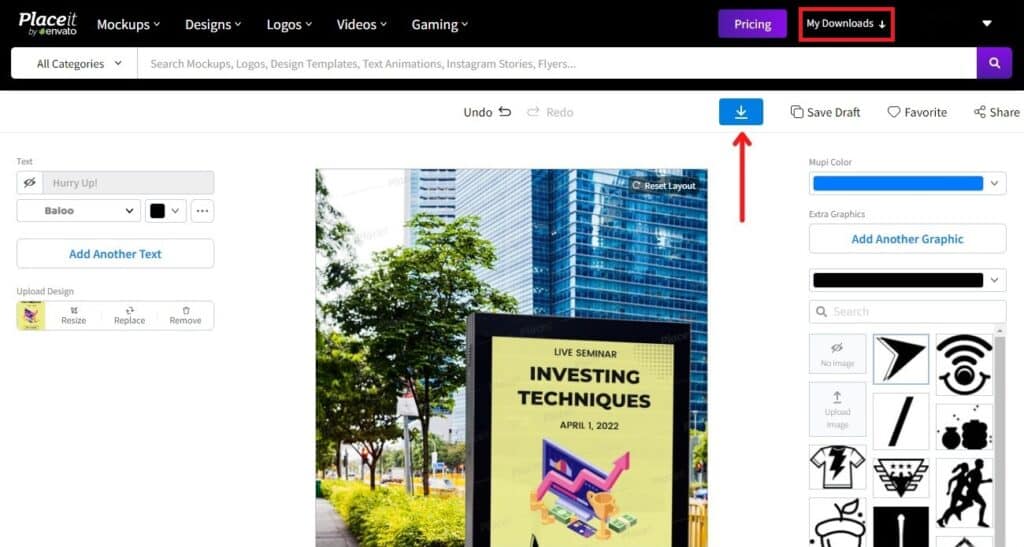
Once in Placeit editor, don’t be surprised by how empty the interface is (i.e. lack of tools, buttons etc.). Everything is just right by the corner!
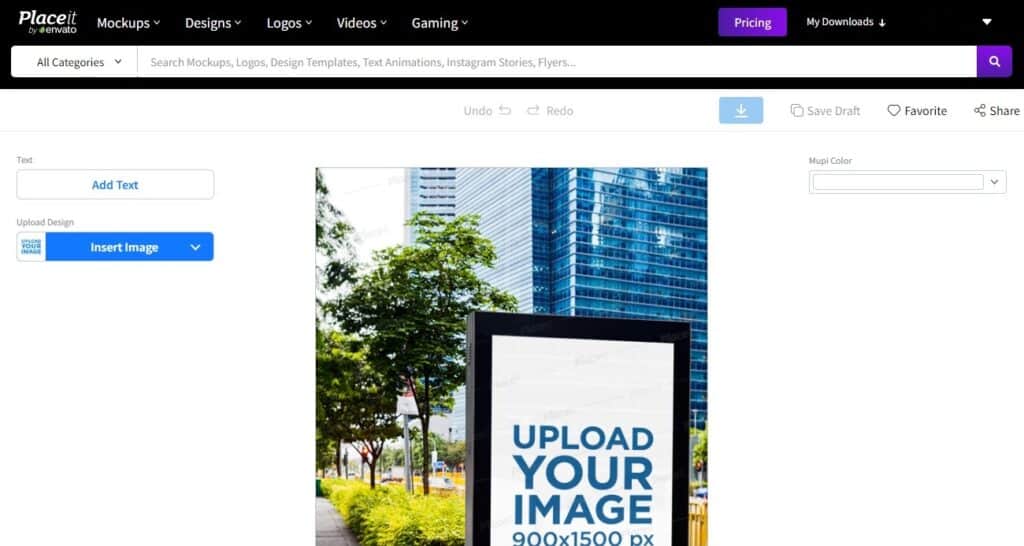
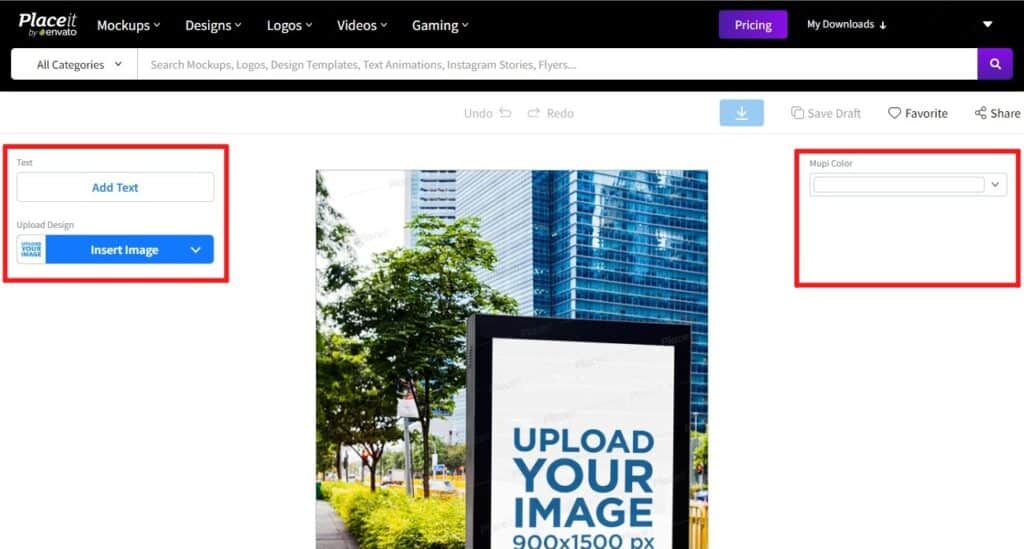
For ease of explanation, we divide the interface to four sections: Center, Top, Left and Right. The Center section is the preview area for your design work. You can see how the mockup or design looks after making changes to the template. Besides previewing, also use this section is to initiate change in any element in the template such as text, images, etc. Also, you can move, resize or rotate elements in the design directly in this Center area.
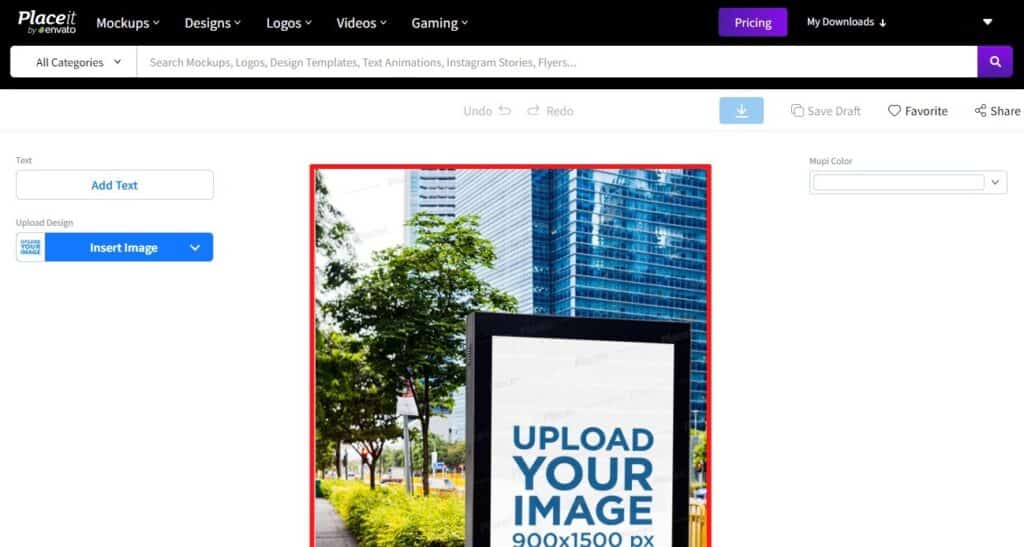
On the other hand, the Left and Right sections contain different sets of editing tools. Although different in location, their functionality is the same. Here, you can change fonts, colors, resize and rotate images, and background color of the mockup, etc. Depending on the elements clicked, different editing tools will appear in these Left and Right sections.
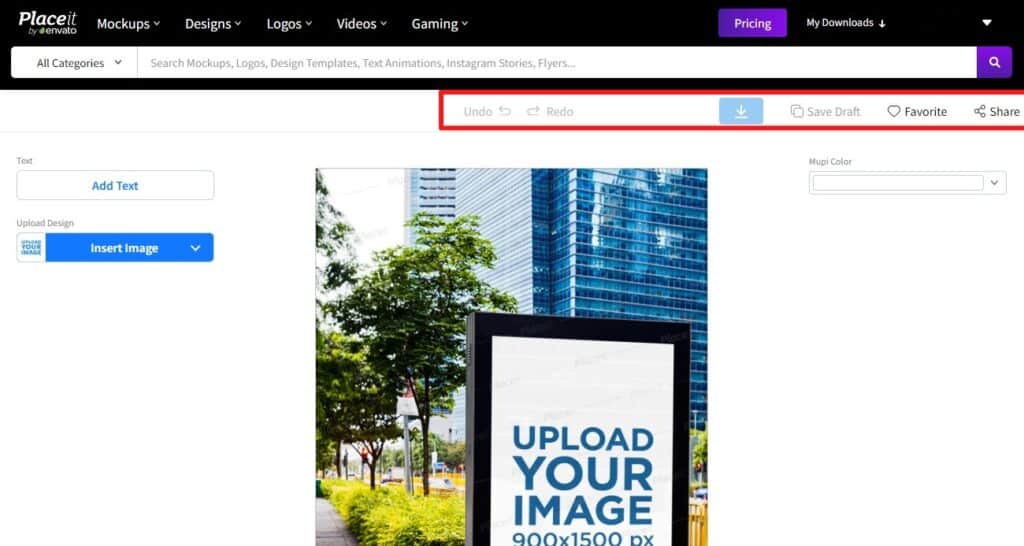
Moving to the Top Section now, it has an Undo/Redo button on the left which is used to revert/revert back any changes made to the design. At the right, there are buttons to download your work, save a draft to continue working later, add this design to ‘favorite’ and also share it to external channels.
3.2 Customisation Steps
After choosing your mockup template, you now need to insert your ready artwork into it before customizing further. If your artwork is not ready yet, or need more customization work, you can use tools like Canva or Photoshop to create or edit. Here’s our tutorial for Canva and Photoshop respectively if you need. Alternatively, you can do so too in Placeit free using their templates at https://placeit.net/c/design-templates.
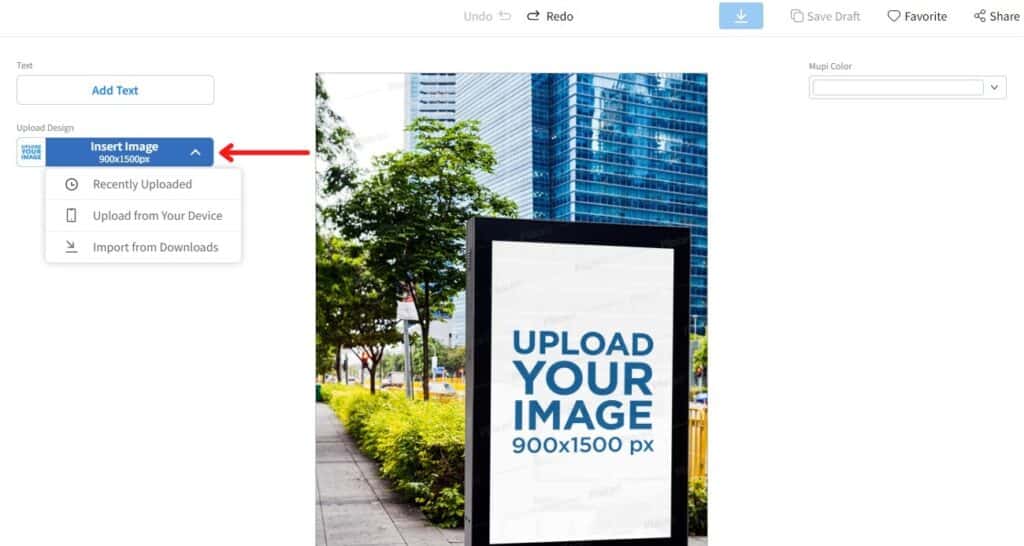
So, once your artwork is ready, click ‘Insert Image’ in the Left section and upload your artwork into the template.
(Comments) Any resolution could work but for best fit, upload an artwork according to the resolution stated. i.e. 900x1500px for our case. Otherwise, you still can crop, zoom and pan in the next step.
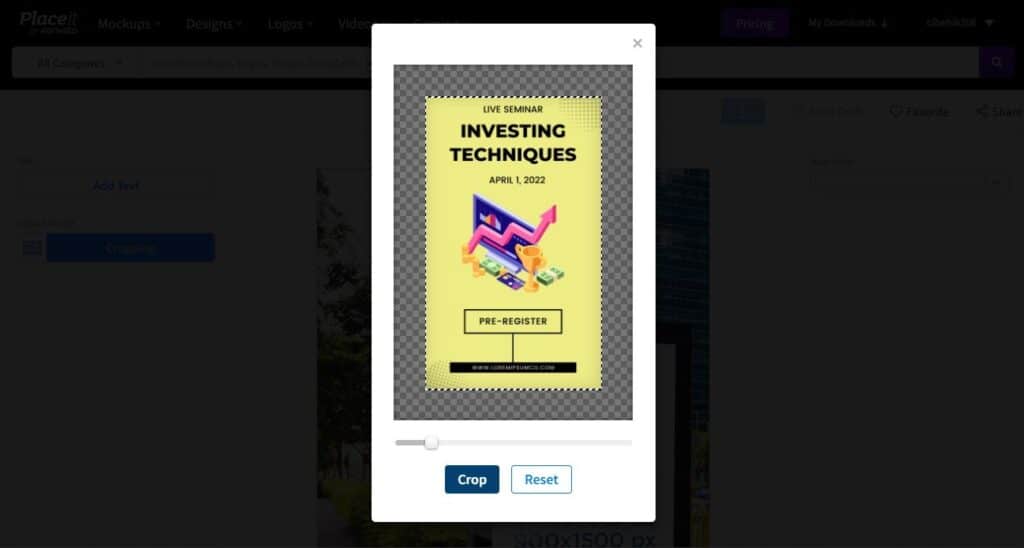
Once done, a popup will appear for you to crop, pan and zoom your artwork. So, adjust the size and placement of the artwork as you like. Then, click ‘Crop’. After some processing, the artwork will automatically fit into the mockup template you’re using.
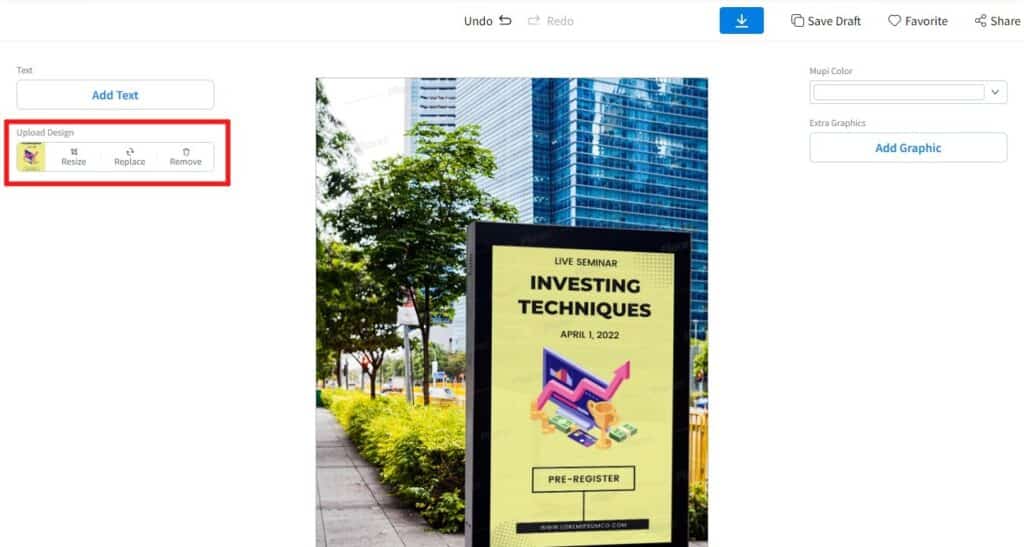
Now, if your artwork didn’t fit in as well, no worries. You can still change its size and position by using ‘Resize’ in the Left section. Also, you can replace or even remove the artwork completely.
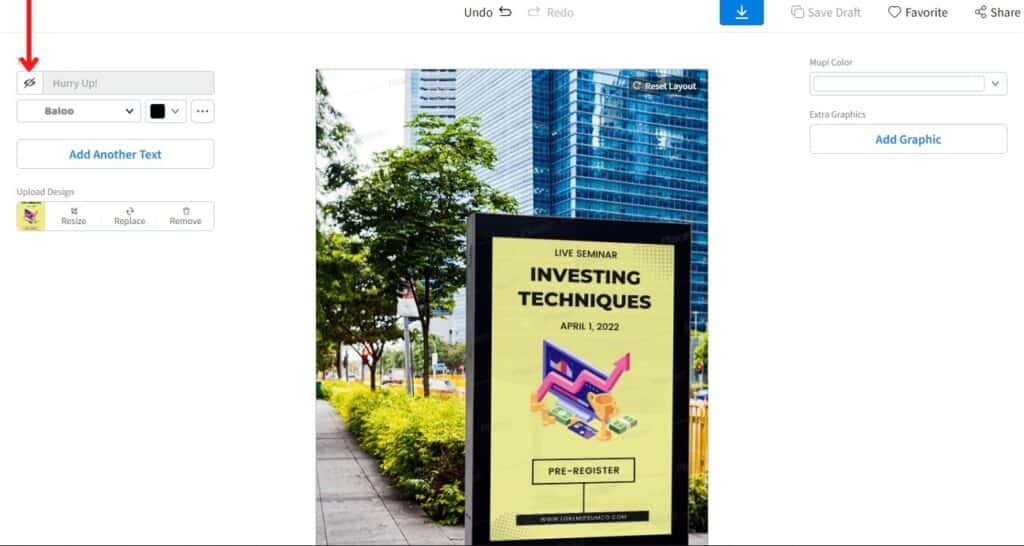
After which, we can decide to add text to our artwork. That is, if your artwork doesn’t need additional texts as your artwork already have it, you can always skip this step. So, click ‘Add Text’ button in the Left section and key in the texts you want. Then, adjust the various text settings (i.e. font type, colour, etc.) to preference. Thereafter, click the text in the Center section to resize and rotate to fit as desired in the mockup.
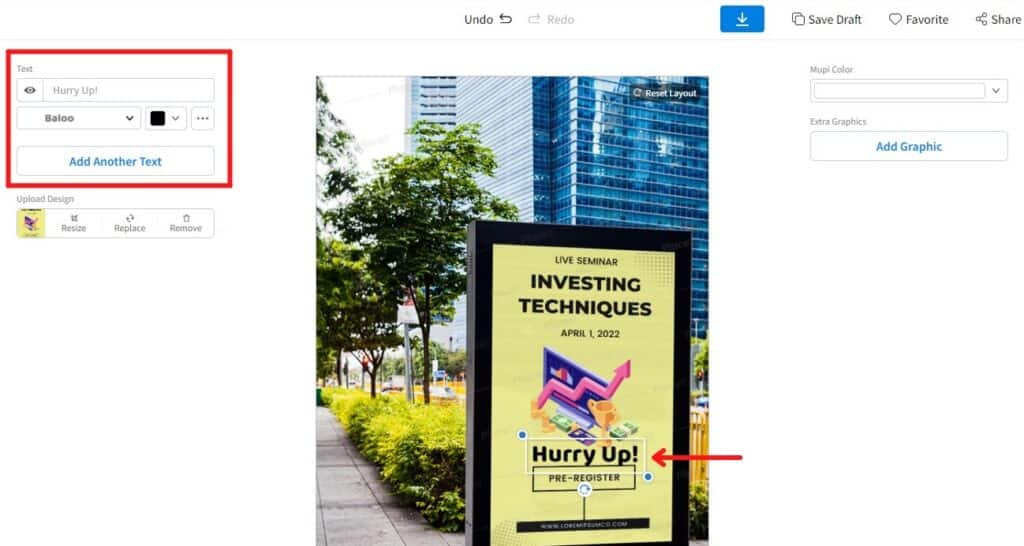
As our artwork already had all the necessary texts included, we decided not to add any more. So, to hide the text from the mockup, click the eye-like button in the Left section
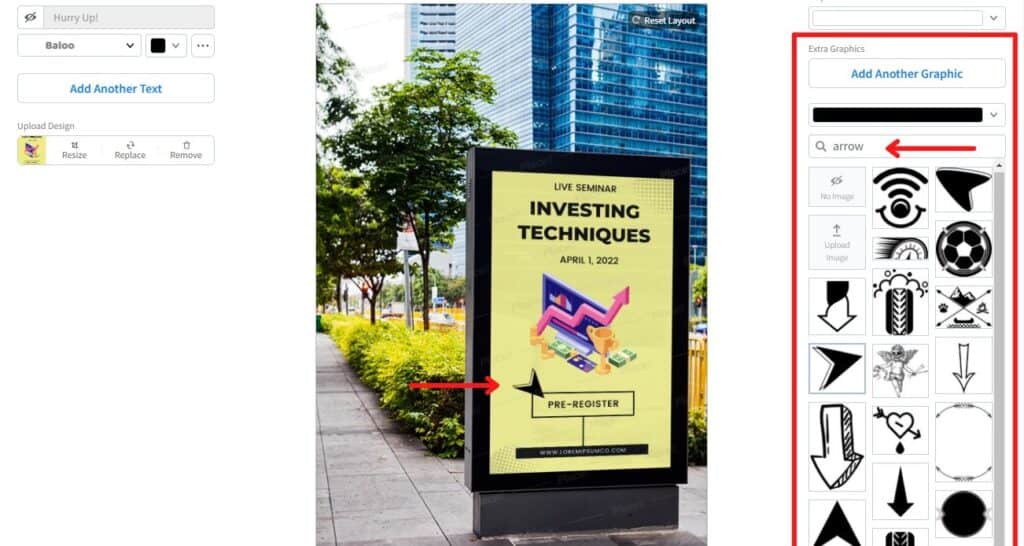
On the Right section, we see that we can also add more graphics into our artwork. So, let’s try it! Click ‘Add Graphic. Browse or search from Placeit free’s library and select the desired. Then, adjust its size, position, and other settings just like that of adding text. Here, we added a small arrow pointing towards the ‘Pre-Register’ box and adjusted its position and color.
(Comments) You can add multiple texts, and graphics within the artwork.
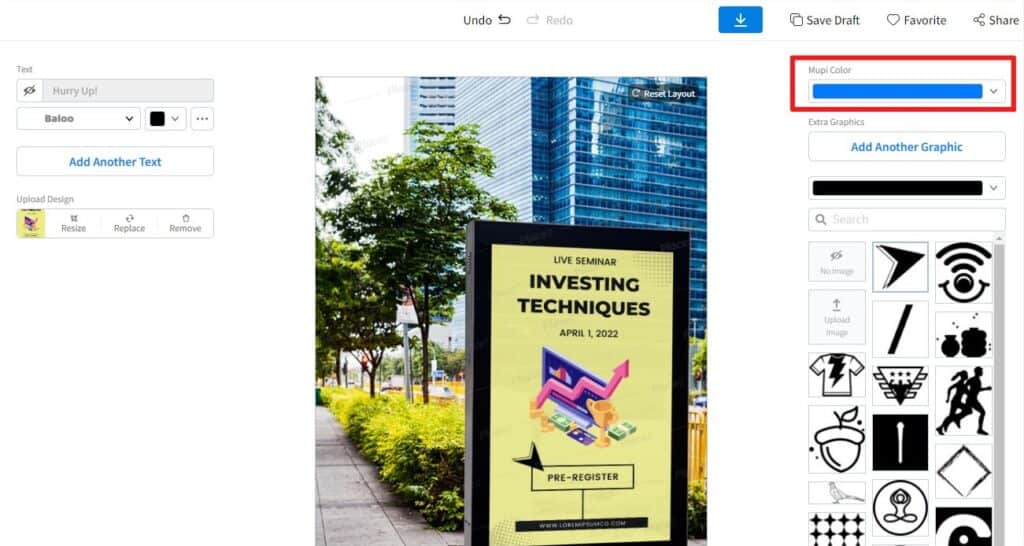
Once done with adding graphics, we now can change the color of the display area in the billboard. To do so, go to the Right section under ‘Mupi Color’, and choose your colour. As our imported artwork was exactly 900x1500px, there weren’t any transparent areas between our artwork and the display area. So, changing the colours wouldn’t show. However, you can try zooming your artwork to intentionally left transparent areas and see how Mupi colours can impact the look of your billboard.
With this, our billboard mockup is ready and fully professional! It’s time to finalize our designed mockup for export into a PNG file.
4. Finalise Design
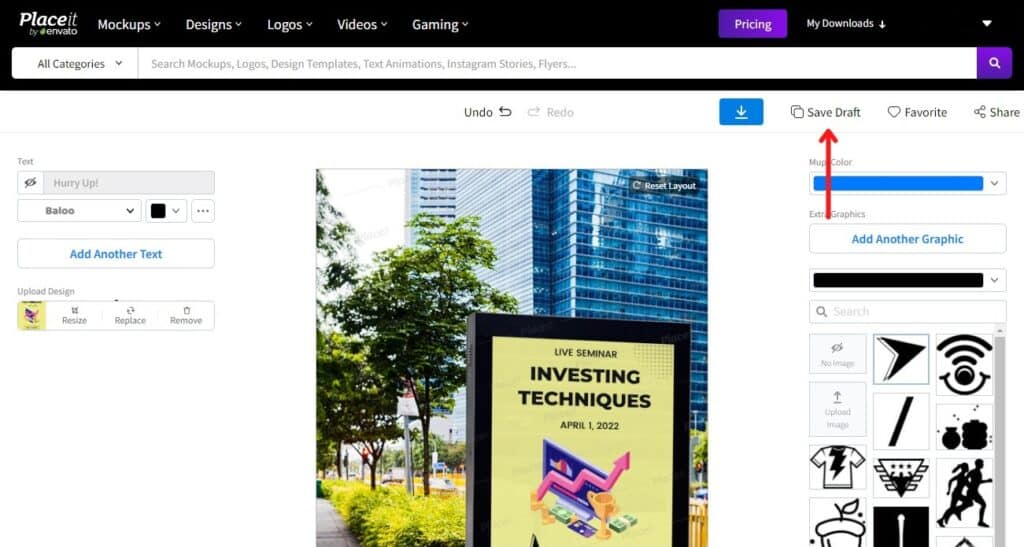
By then, if you haven’t been saving your work frequently with ‘Save Draft’, you should! Just click on ‘Save Draft’ at the Top section. By doing this, you can come back whenever you want and pick up from where you left off.
(Comments) Regrettably, Placeit doesn’t save automatically as you work! So, be sure to hit ‘Save Draft’ every now and then on your own!
Lastly, to download the work, click the blue download button (downward-facing arrow). Thereafter, you can find all your downloaded work in ‘My Downloads’ located at the very top right corner.
(Comments) Unfortunately, Placeit only allows saving to PNG. So, if you need to save to another format, you would need to use your own software.
In the next section, you can view our finalized design output below. Excited?
5. Our Final Output
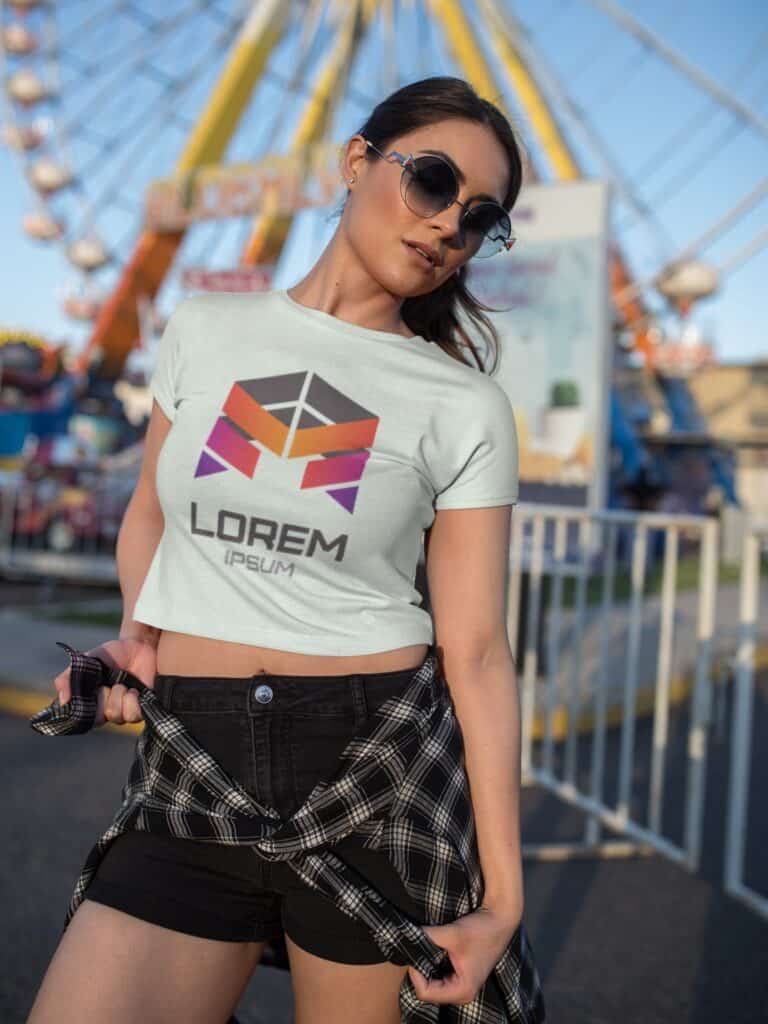
6. What Other Mockups Can You Make With Placeit?
If you’re wondering how easy it is to make mockups with Placeit free, you’re right! Above all, you can make a whole lot of other mockups too! From apparels, books, apps, watches, bags and many more! Afterall, talking is cheap, so we created two more mockups to show you below! Enjoy!
Final Comments
See! Placeit is too easy! Use the above tutorial steps with a Placeit free account to create all sorts of mockups, and for all sorts of purposes! It isn’t hard, but you do need your artwork ready first which can also be created from Placeit free itself. Honestly, what else can we say? Try it, and find out what Placeit can do for you and your businesses!

Activities
What mockups do you wish to use Placeit free for? Tell us with a COMMENT below.
LIKE & SHARE this tutorial with all Marketers, Advertisers and Designers you know!
HASHTAG #DonutAtwork
Tags you may be interested in: Creative Development | Digital Advertising | Social Media Management